Category: Makeup

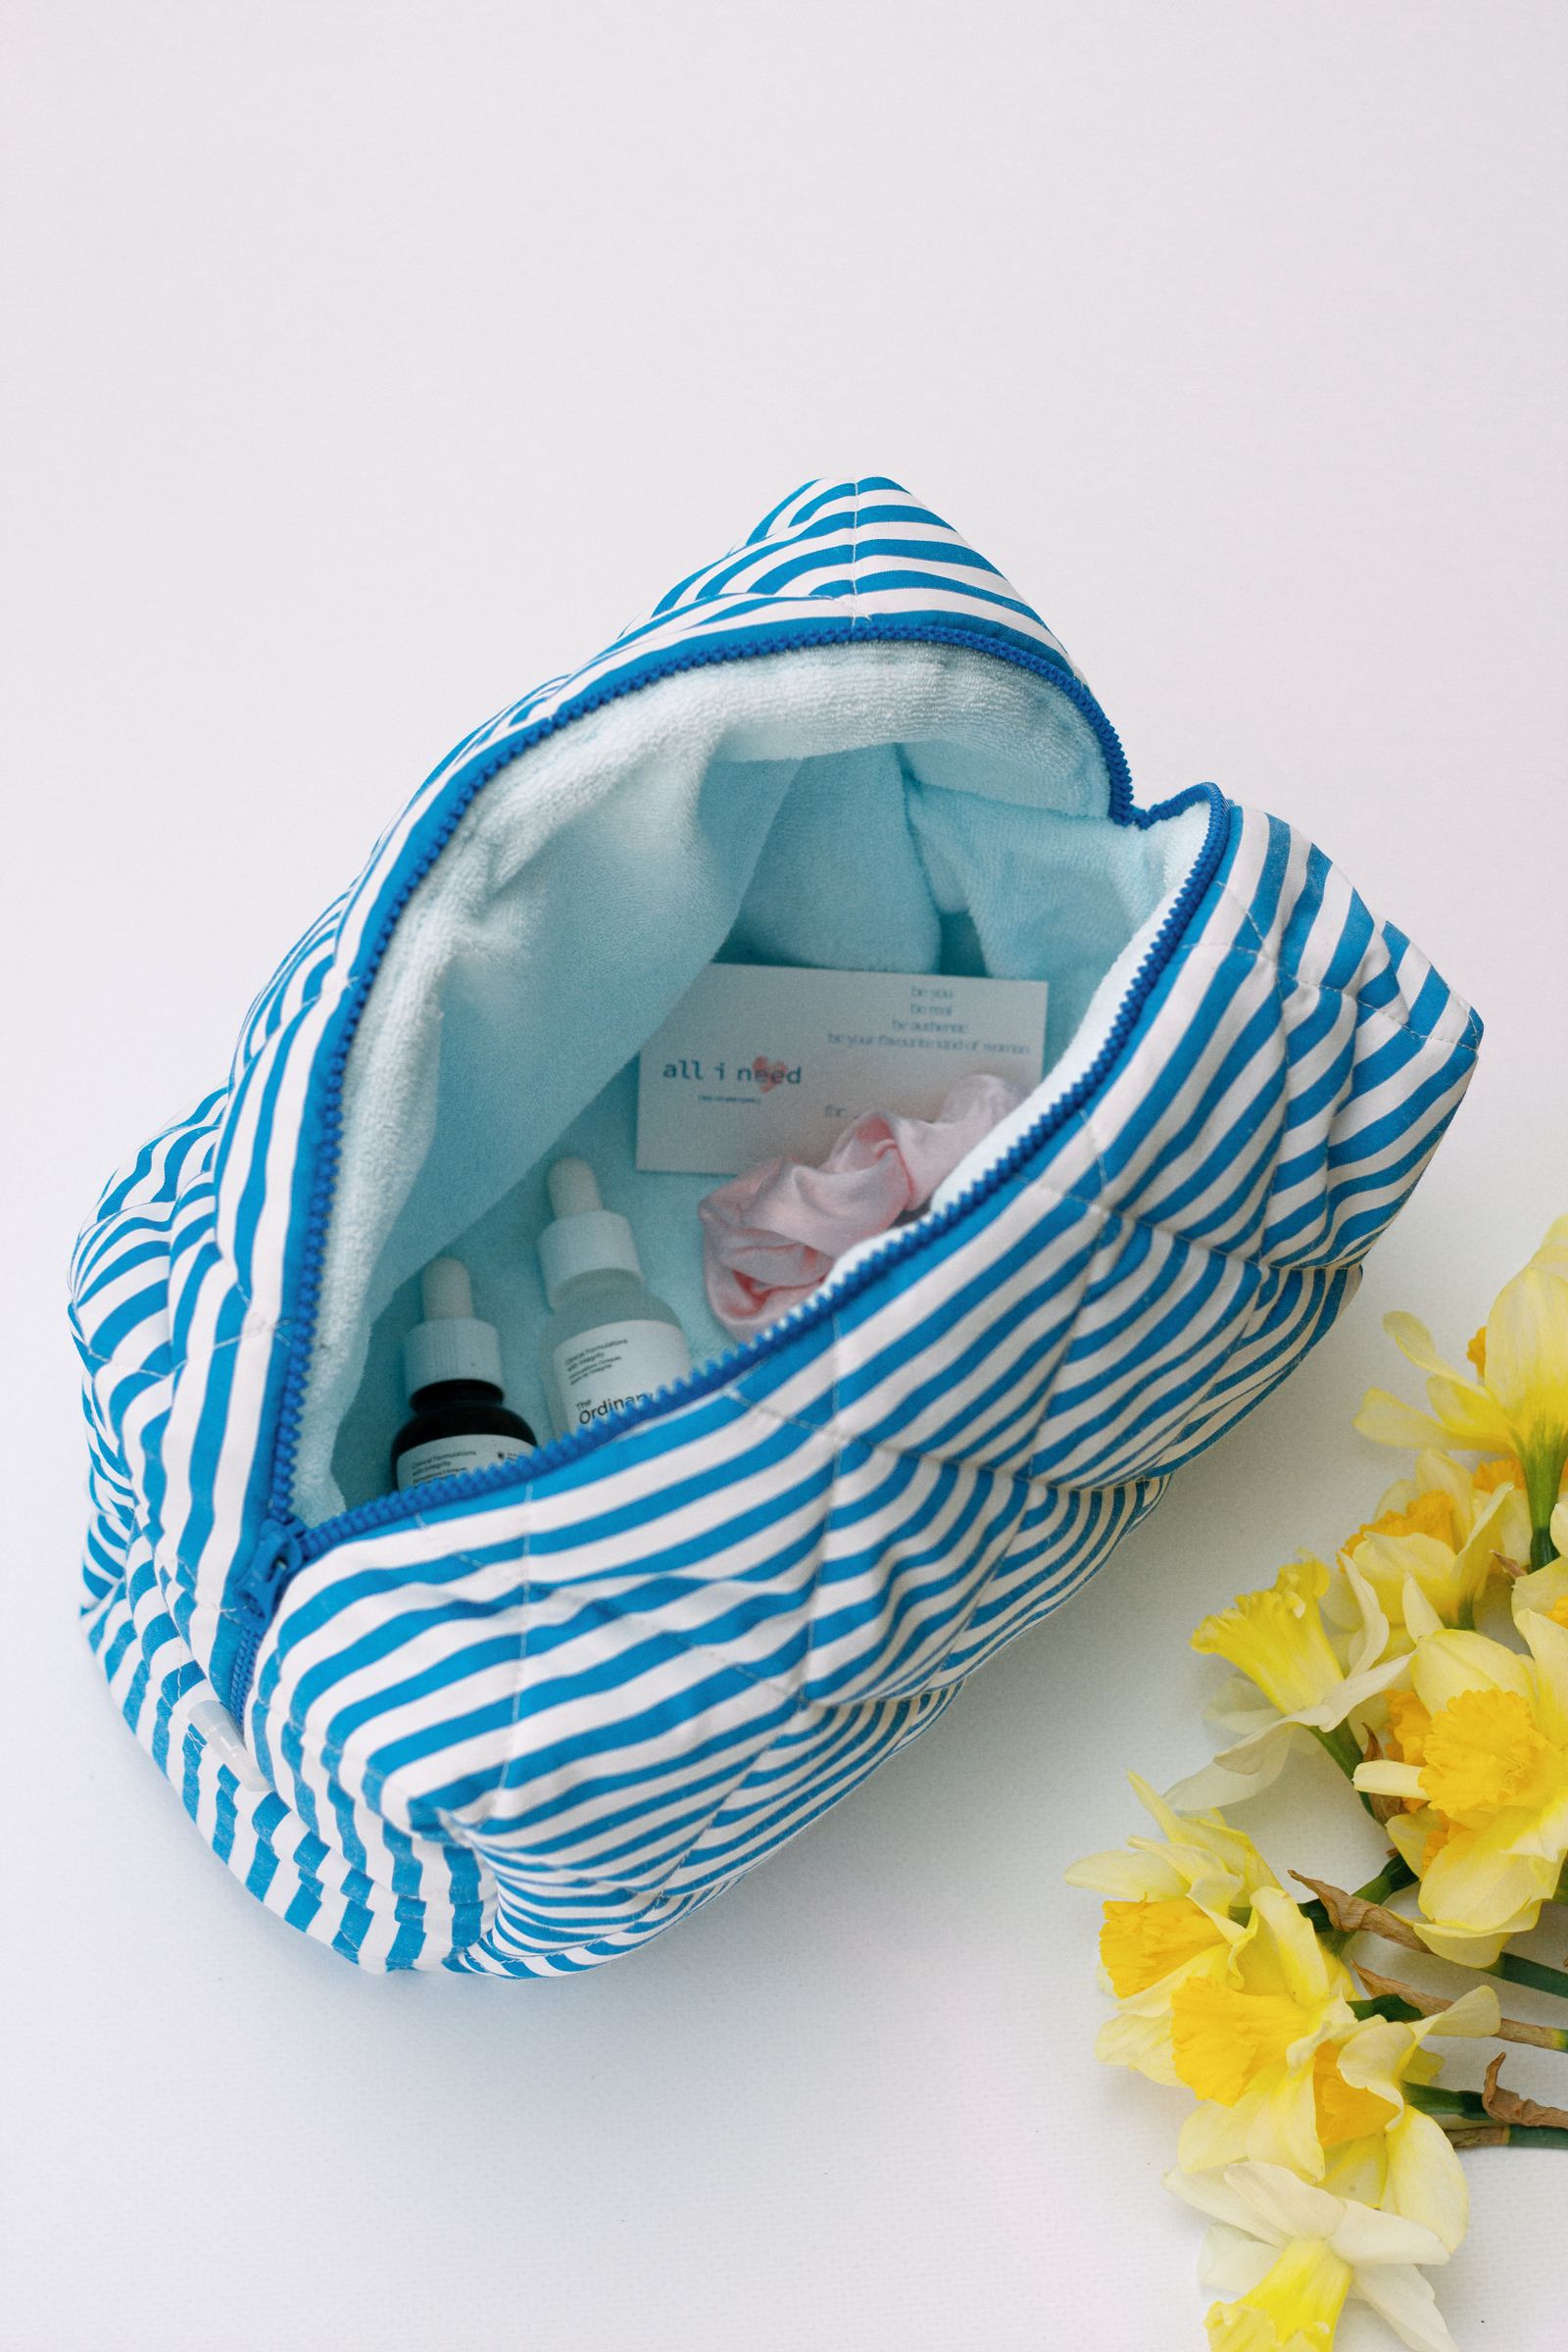
  • How to Create a Vacation Beauty Bag with Only the Products You Truly Need

    How to Create a Vacation Beauty Bag with Only the Products You Truly Need

    A well-planned vacation beauty bag should make travel easier, not turn into a second suitcase. The goal is to bring products that support your normal routine, suit the destination, and can be used without spending too much time getting ready.

    Building a streamlined vacation beauty bag begins with separating genuine essentials from products you might use only in an ideal travel scenario. By choosing versatile formulas, practical sizes, and dependable favorites, you can pack less while still feeling comfortable and polished throughout the trip.

    Consider the Destination and Your Plans

    Before choosing products, think about the weather, length of the trip, available luggage space, and activities on your schedule. A humid beach destination requires different preparation from a cold city break or a formal weekend celebration.

    Review your expected plans rather than packing for every possibility. If most days involve sightseeing and casual meals, you probably do not need several foundations, multiple eyeshadow palettes, or a collection of styling tools.

    Consider these practical questions:

    • Will the weather be hot, humid, cold, or dry?
    • Will you spend significant time outdoors?
    • Do any plans require formal makeup or hair styling?
    • Will you have access to a hotel hair dryer or toiletries?
    • Are you traveling with carry-on luggage only?

    Check current airline and airport rules before packing liquids, aerosols, gels, and sharp grooming tools. Requirements can vary by airport, airline, and destination.

    Begin With a Simple Skincare Core

    Travel is usually not the best time to experiment with several unfamiliar skincare products. Changes in weather, sleep, food, water, and transportation can already affect how the skin feels. Bring a small version of the routine your skin knows.

    A practical skincare core may include:

    • A gentle cleanser
    • A moisturizer suited to the destination
    • Broad-spectrum facial sunscreen
    • Lip balm
    • One treatment product you use consistently

    If you wear makeup or water-resistant sunscreen, include a cleansing balm, oil, or micellar water for thorough evening removal. Transfer products into clean, travel-size containers only when the formula can be stored safely outside its original packaging.

    Skip occasional masks, multiple serums, and strong exfoliating products unless they are essential to your established routine. A simpler routine is easier to follow after a long travel day.

    Make Sunscreen Easy to Use and Reapply

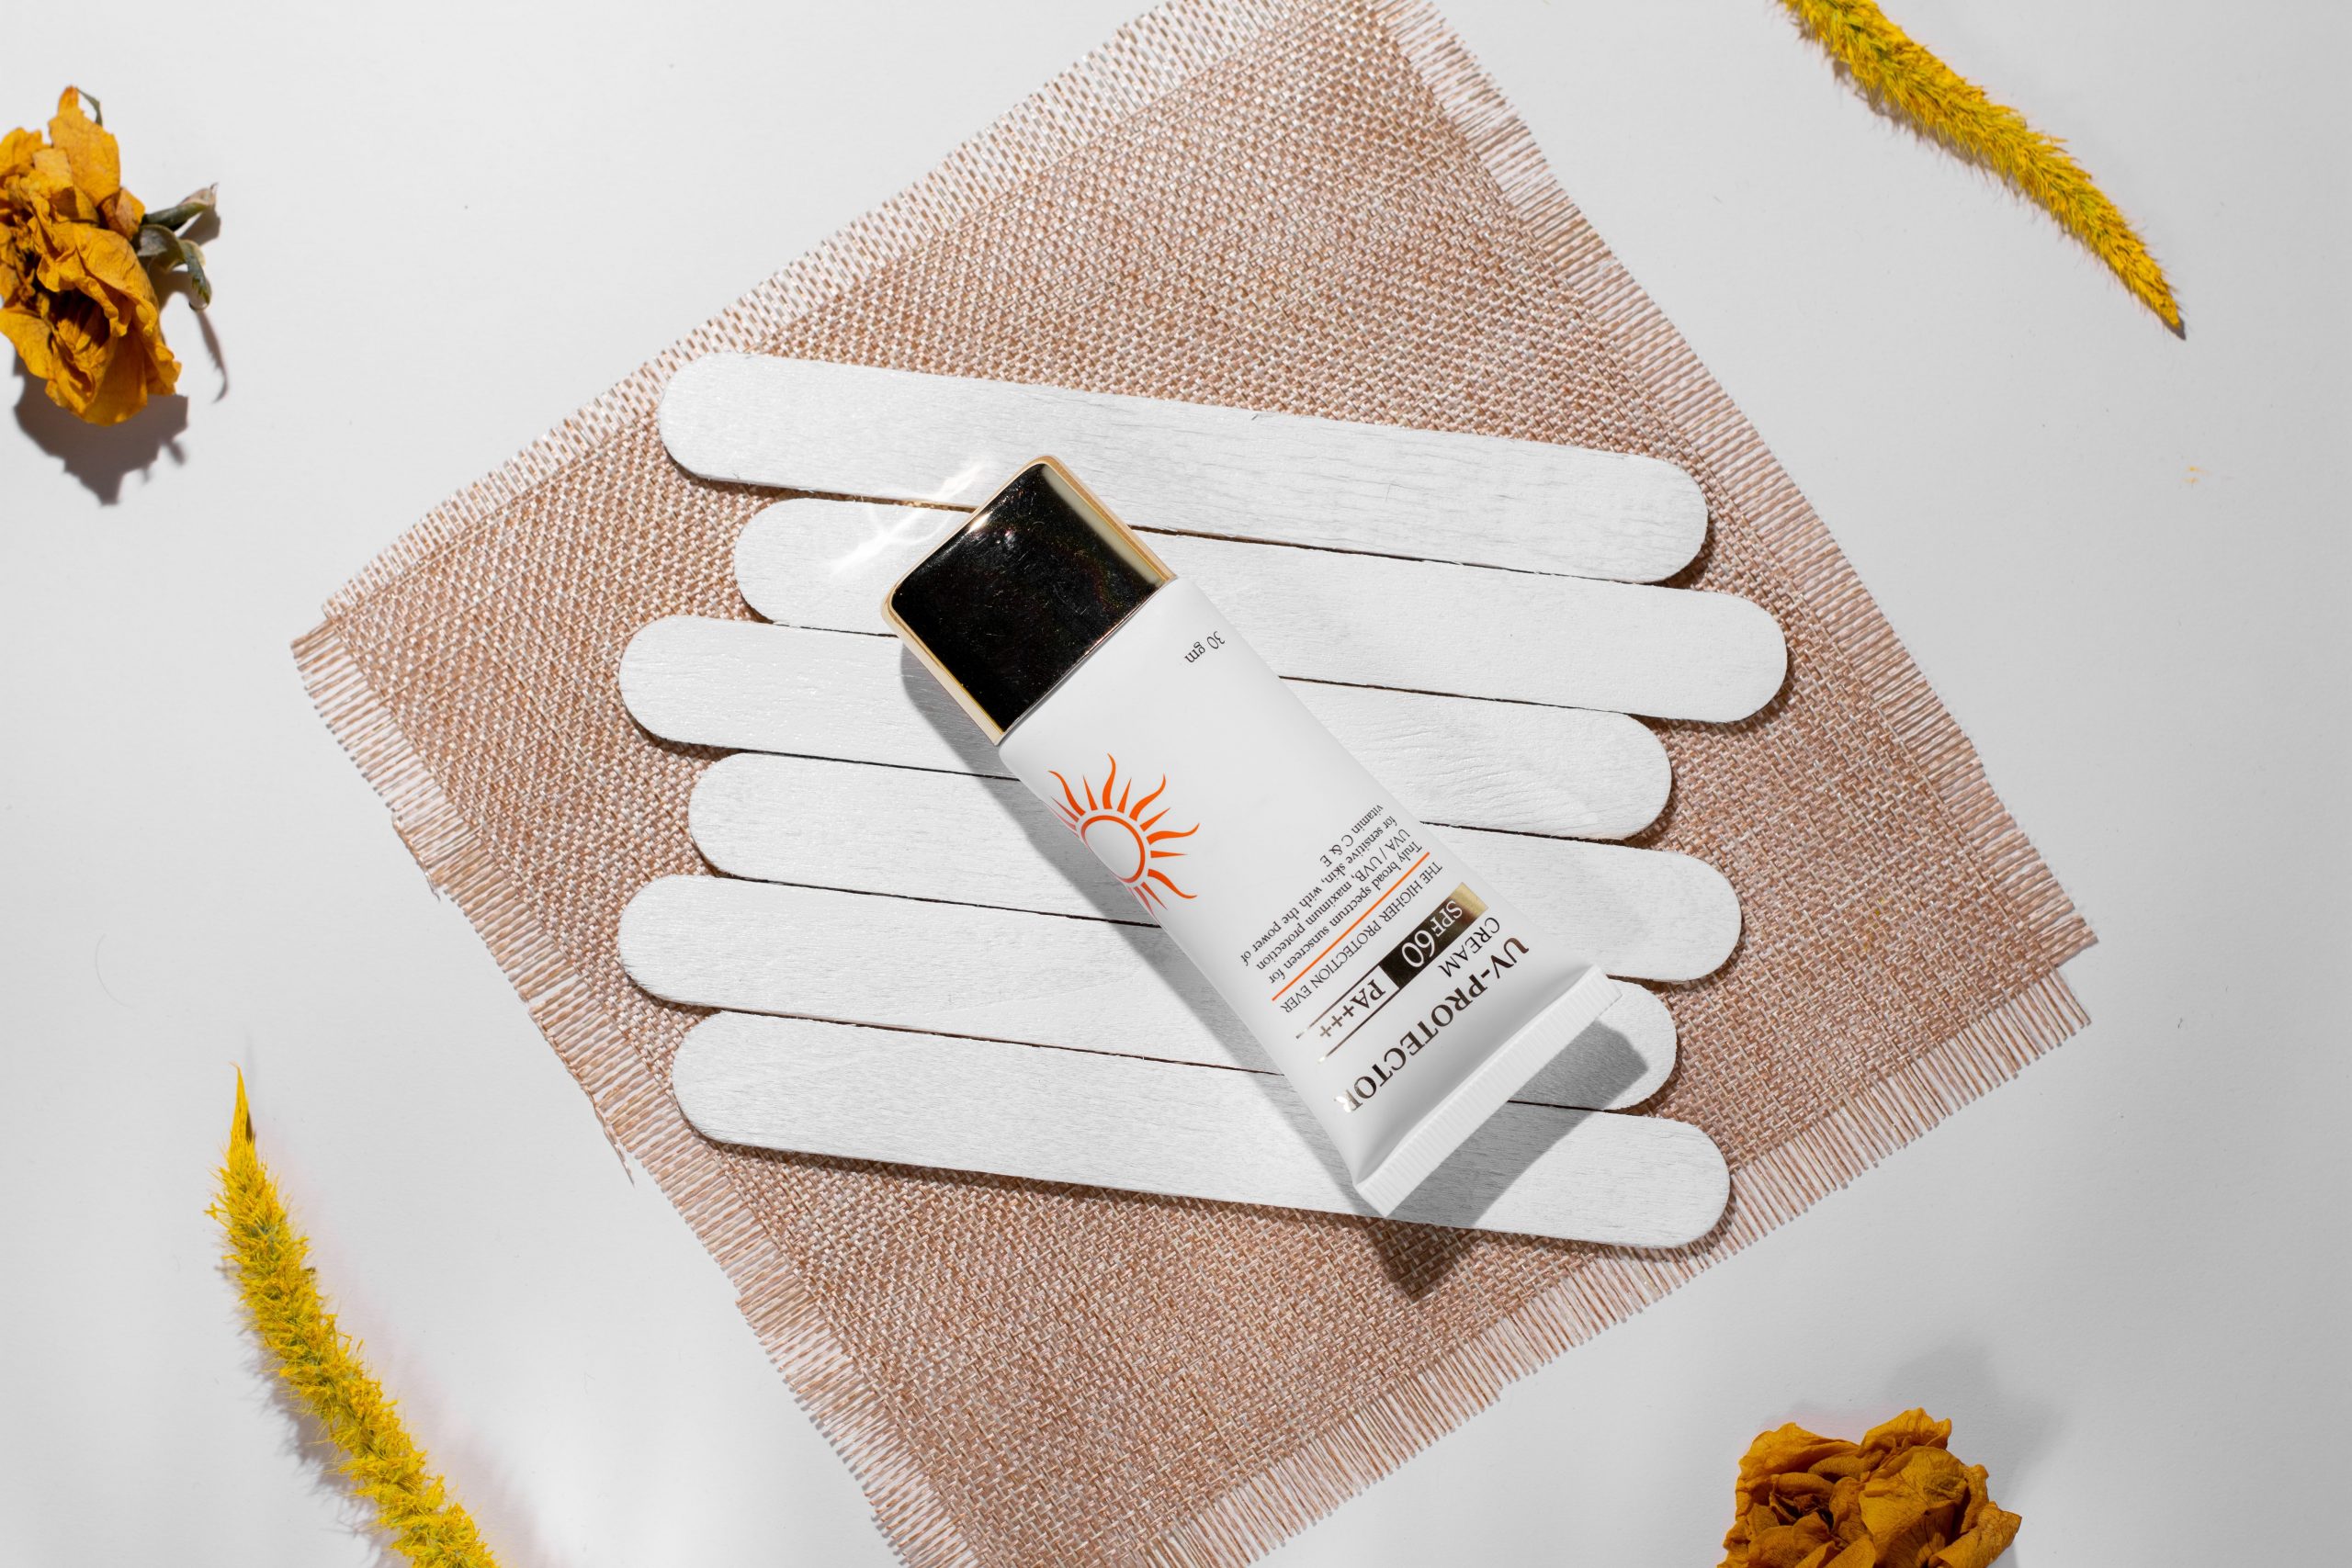
    Sunscreen deserves its own space in a vacation beauty bag, particularly when the trip includes beaches, outdoor sightseeing, hiking, or extended time near windows.

    Bring separate facial and body sunscreens if that makes application more comfortable. Choose formulas you have already tested so you know how they feel, whether they leave a visible cast, and how they work beneath makeup.

    A travel-size sunscreen may not be enough for several days of generous body application. Estimate how much you normally use and pack accordingly, or plan to purchase more after arrival.

    Consider adding an SPF lip balm, sunglasses, a hat, and lightweight protective clothing. Sunscreen is most useful when combined with shade and other forms of sun protection.

    Build a Small Vacation Makeup Capsule

    Your travel makeup collection should create at least two looks: a quick everyday look and a slightly more polished evening version. You can usually accomplish this with a small group of products rather than separate makeup for every outfit.

    A streamlined makeup capsule might include:

    • A skin tint, lightweight foundation, or concealer
    • One blush in a versatile shade
    • A brow pencil or tinted brow gel
    • Mascara
    • A small neutral eyeshadow palette or one cream shadow
    • One everyday lip color
    • One slightly deeper or brighter lip color for evenings

    Choose formulas that can be applied with fingers or one multipurpose brush when possible. Cream blush, shadow sticks, and sheer complexion products can reduce the number of tools you need.

    Water-resistant mascara, brow products, and eyeliner may be useful for warm destinations or active days. Test them before traveling and bring the appropriate remover.

    Choose Multipurpose Products Carefully

    Multipurpose products can save space when they genuinely perform more than one role. A cheek-and-lip tint, neutral cream color, moisturizing sunscreen, or versatile balm may replace several separate items.

    Only use products on areas approved by their manufacturer. A lipstick may work as blush in some cases, but not every pigment or formula is designed for use around the eyes. Similarly, facial products may not always provide enough quantity or protection for the body.

    Think about which multipurpose products you actually use at home. A travel-friendly item is not helpful if the texture is difficult to blend or the color does not work with your wardrobe.

    One dependable single-purpose product is often better than a multipurpose formula that performs every task poorly.

    Keep Haircare Practical and Destination-Friendly

    Start with the products necessary to cleanse and condition your hair. Check whether your accommodation provides suitable shampoo and conditioner, but bring your own if your hair has specific needs.

    A simple haircare kit may include shampoo, conditioner, a leave-in product, a small styling cream or serum, a brush or comb, and several secure hair ties. Dry shampoo may be useful between washes, but review airline rules if you plan to pack an aerosol.

    Choose two or three dependable hairstyles for the trip. A low bun, braid, ponytail, or claw-clip style can reduce the need for multiple heat tools. If you bring a styling tool, confirm the destination’s voltage and plug requirements.

    Pack a hat, scarf, or comfortable hair accessory for windy, humid, or active days. These can be more practical than trying to maintain a carefully styled look in unfamiliar weather.

    Do Not Forget Body Care and Personal Essentials

    Body care can remain simple. Bring a gentle body cleanser when needed, a moisturizer suited to the climate, deodorant, and body sunscreen. A small hand cream may be useful during flights and in dry environments.

    Include the grooming items you use regularly, such as a razor, tweezers, nail file, contact-lens supplies, or menstrual products. Pack medications separately and follow appropriate travel guidance for prescriptions.

    Fragrance is optional. If you want to bring it, use a secure travel spray or a small manufacturer-provided bottle rather than packing a large glass container. Protect it from heat and direct sunlight.

    A small stain remover, tissues, and a few adhesive bandages may provide more practical value than an additional makeup product.

    Use Travel Sizes Without Creating Waste

    Travel-size packaging can be convenient, but buying a miniature version of every product may become expensive and wasteful. Refillable bottles and jars can work well for shampoo, conditioner, cleanser, and moisturizer.

    Label every container clearly. Similar-looking creams and liquids can be difficult to identify after they have been removed from their original packaging.

    Do not transfer products that depend on airless packaging, special applicators, or light-protective containers unless the manufacturer indicates that it is appropriate. Sunscreen is generally safest in its original packaging because transferring it may affect storage, identification, and application instructions.

    Clean reusable containers thoroughly between trips and allow them to dry completely before refilling.

    Pack the Bag to Prevent Leaks and Damage

    Tighten every lid and check that pumps are locked. Place liquids and creams in a transparent, leak-resistant pouch so spills are easier to contain and security checks are simpler.

    Protect pressed powders and palettes by placing a soft cotton pad inside the compact when there is enough room to close it without pressure. Keep glass bottles cushioned between soft items rather than against the outside of the suitcase.

    Store brushes in a clean case that protects the bristles. Avoid placing damp sponges or washcloths into a sealed beauty bag, since trapped moisture can create an unpleasant environment.

    Keep essential skincare, medication, deodorant, and basic makeup in your carry-on when appropriate. This gives you access to the most important items if checked luggage is delayed.

    Do a Final Edit Before Leaving

    Lay every product out in one place and group items by purpose. If two products perform the same role, choose the one that is more versatile, reliable, or compact.

    Ask whether you used each product during the previous week. If not, consider leaving it at home unless it serves a specific purpose for the trip.

    Remove duplicate shades, backup products that can be purchased easily, and items you are bringing only because there is empty space. A smaller bag is easier to organize and makes getting ready faster.

    After returning home, note what you used and what remained untouched. This makes packing for the next vacation even more efficient.

    Final Thoughts

    A useful vacation beauty bag is built around your real routine and actual travel plans. Begin with gentle skincare and sunscreen, add a small makeup capsule, bring practical hair and body essentials, and choose multipurpose products only when they genuinely earn their space.

    Packing fewer dependable products can reduce luggage weight, prevent clutter, and give you more time to enjoy the trip. The best travel beauty collection is not the largest one; it is the one that helps you feel comfortable without demanding constant attention.

    FAQs

    How many makeup products should I pack for a one-week vacation?

    Many travelers can manage with six to eight products: complexion coverage, blush, brow product, mascara, one eye product, and one or two lip colors. Adjust the list for formal plans and personal preferences.

    Should I transfer sunscreen into a travel container?

    It is generally better to keep sunscreen in its original packaging so its storage information, instructions, and product identity remain clear.

    What beauty products should stay in my carry-on?

    Keep essential skincare, medication, deodorant, lip balm, sunscreen, and a few basic makeup products with you, provided they comply with current security rules.

    How can I stop beauty products from leaking in my luggage?

    Lock pumps, tighten lids, use leak-resistant pouches, and keep containers upright when possible. Do not fill reusable bottles completely because pressure changes may contribute to leaks.

    Which makeup products are most useful for a beach vacation?

    Consider lightweight complexion coverage, cream blush, brow gel, water-resistant mascara, tinted lip balm, and thoroughly tested facial and body sunscreens.

    How can I avoid overpacking my vacation beauty bag?

    Plan for your actual activities, remove duplicate products, choose one everyday and one evening option, and leave behind anything you have not used recently. RECOMMENDED WORDPRESS TAG: Travel Beauty Essentials

  • Heatproof Makeup: Tips for a Fresh Look That Holds Up on Warm Days

    Heatproof Makeup: Tips for a Fresh Look That Holds Up on Warm Days

    Warm weather can make a carefully applied makeup look feel heavy, shiny, or uneven within a few hours. Heat, humidity, perspiration, and sunscreen can all affect how products sit on the skin, especially when several rich layers are applied at once.

    Heatproof makeup is not about making every product completely resistant to sweat. It is about choosing lightweight formulas, applying thin layers, and preparing for simple touch-ups. With a few adjustments, you can create a fresh look that remains comfortable through commutes, outdoor plans, and warm evenings.

    Start With Lightweight Skin Preparation

    Makeup usually lasts better when the skincare underneath has had time to settle. Begin with a gentle cleanse or lukewarm-water rinse, followed by a lightweight moisturizer if your skin needs one.

    Gel creams, fluid lotions, and lightweight moisturizers often feel more comfortable in heat and humidity. Apply only as much as your skin needs, concentrating richer products on dry areas rather than covering the entire face heavily.

    Finish with broad-spectrum sunscreen and allow it to set before applying makeup. If your sunscreen provides enough moisture, it may be able to replace a separate daytime moisturizer. This removes one layer and can make the overall routine feel lighter.

    Avoid aggressively drying the skin in an attempt to control shine. Harsh cleansers and excessive mattifying products may leave skin dehydrated, which can make makeup look patchy or uncomfortable.

    Use Primer Only Where It Helps

    Primer can improve the way makeup applies, but it does not need to cover the entire face. Use a smoothing or mattifying primer only on areas where makeup tends to separate or shine, such as the forehead, nose, and chin.

    For dry areas, a hydrating primer may help prevent foundation from clinging to texture. If your skincare and sunscreen already create a smooth base, you may not need primer at all.

    Make sure the textures of your products work together. Silicone-rich primers may not always layer smoothly with certain water-based complexion products, while very emollient skincare can cause foundation to move. Test combinations before an important event.

    Apply primer in a thin layer and give it a moment to settle. Using more product does not necessarily make makeup last longer.

    Choose a Lightweight, Heatproof Makeup Base

    Full-coverage foundation can feel heavy in warm weather and may become more noticeable as it wears. Consider a skin tint, tinted sunscreen, lightweight foundation, or concealer applied only where you want extra coverage.

    Begin at the center of the face and blend outward, leaving the edges lighter. Use a damp sponge, brush, or clean fingertips to press the product into the skin rather than applying one thick coat.

    If more coverage is needed, build it in thin layers. Allow each layer to settle before adding another. This usually creates a more natural and durable finish than applying a large amount at once.

    Choose long-wearing or water-resistant formulas when you expect significant humidity or perspiration, but remember that no foundation is completely unaffected by heat. Comfort and graceful fading are often more useful than maximum coverage.

    Apply Concealer Strategically

    Concealer can provide polish without requiring foundation across the entire face. Place a small amount around the inner corners of the eyes, sides of the nose, or individual areas of discoloration.

    Let the concealer sit briefly before blending if you want slightly more coverage. Use a small brush or fingertip to soften the edges while keeping the product concentrated where it is needed.

    Under the eyes, avoid applying a thick triangle of product. Heat and facial movement may cause excess concealer to crease. A few small dots blended carefully can look fresher and require less powder.

    If you need to cover a blemish, use a thin layer of concealer close to your skin tone and press the edges gently. Avoid repeatedly touching the area throughout the day.

    Layer Cream and Powder With Restraint

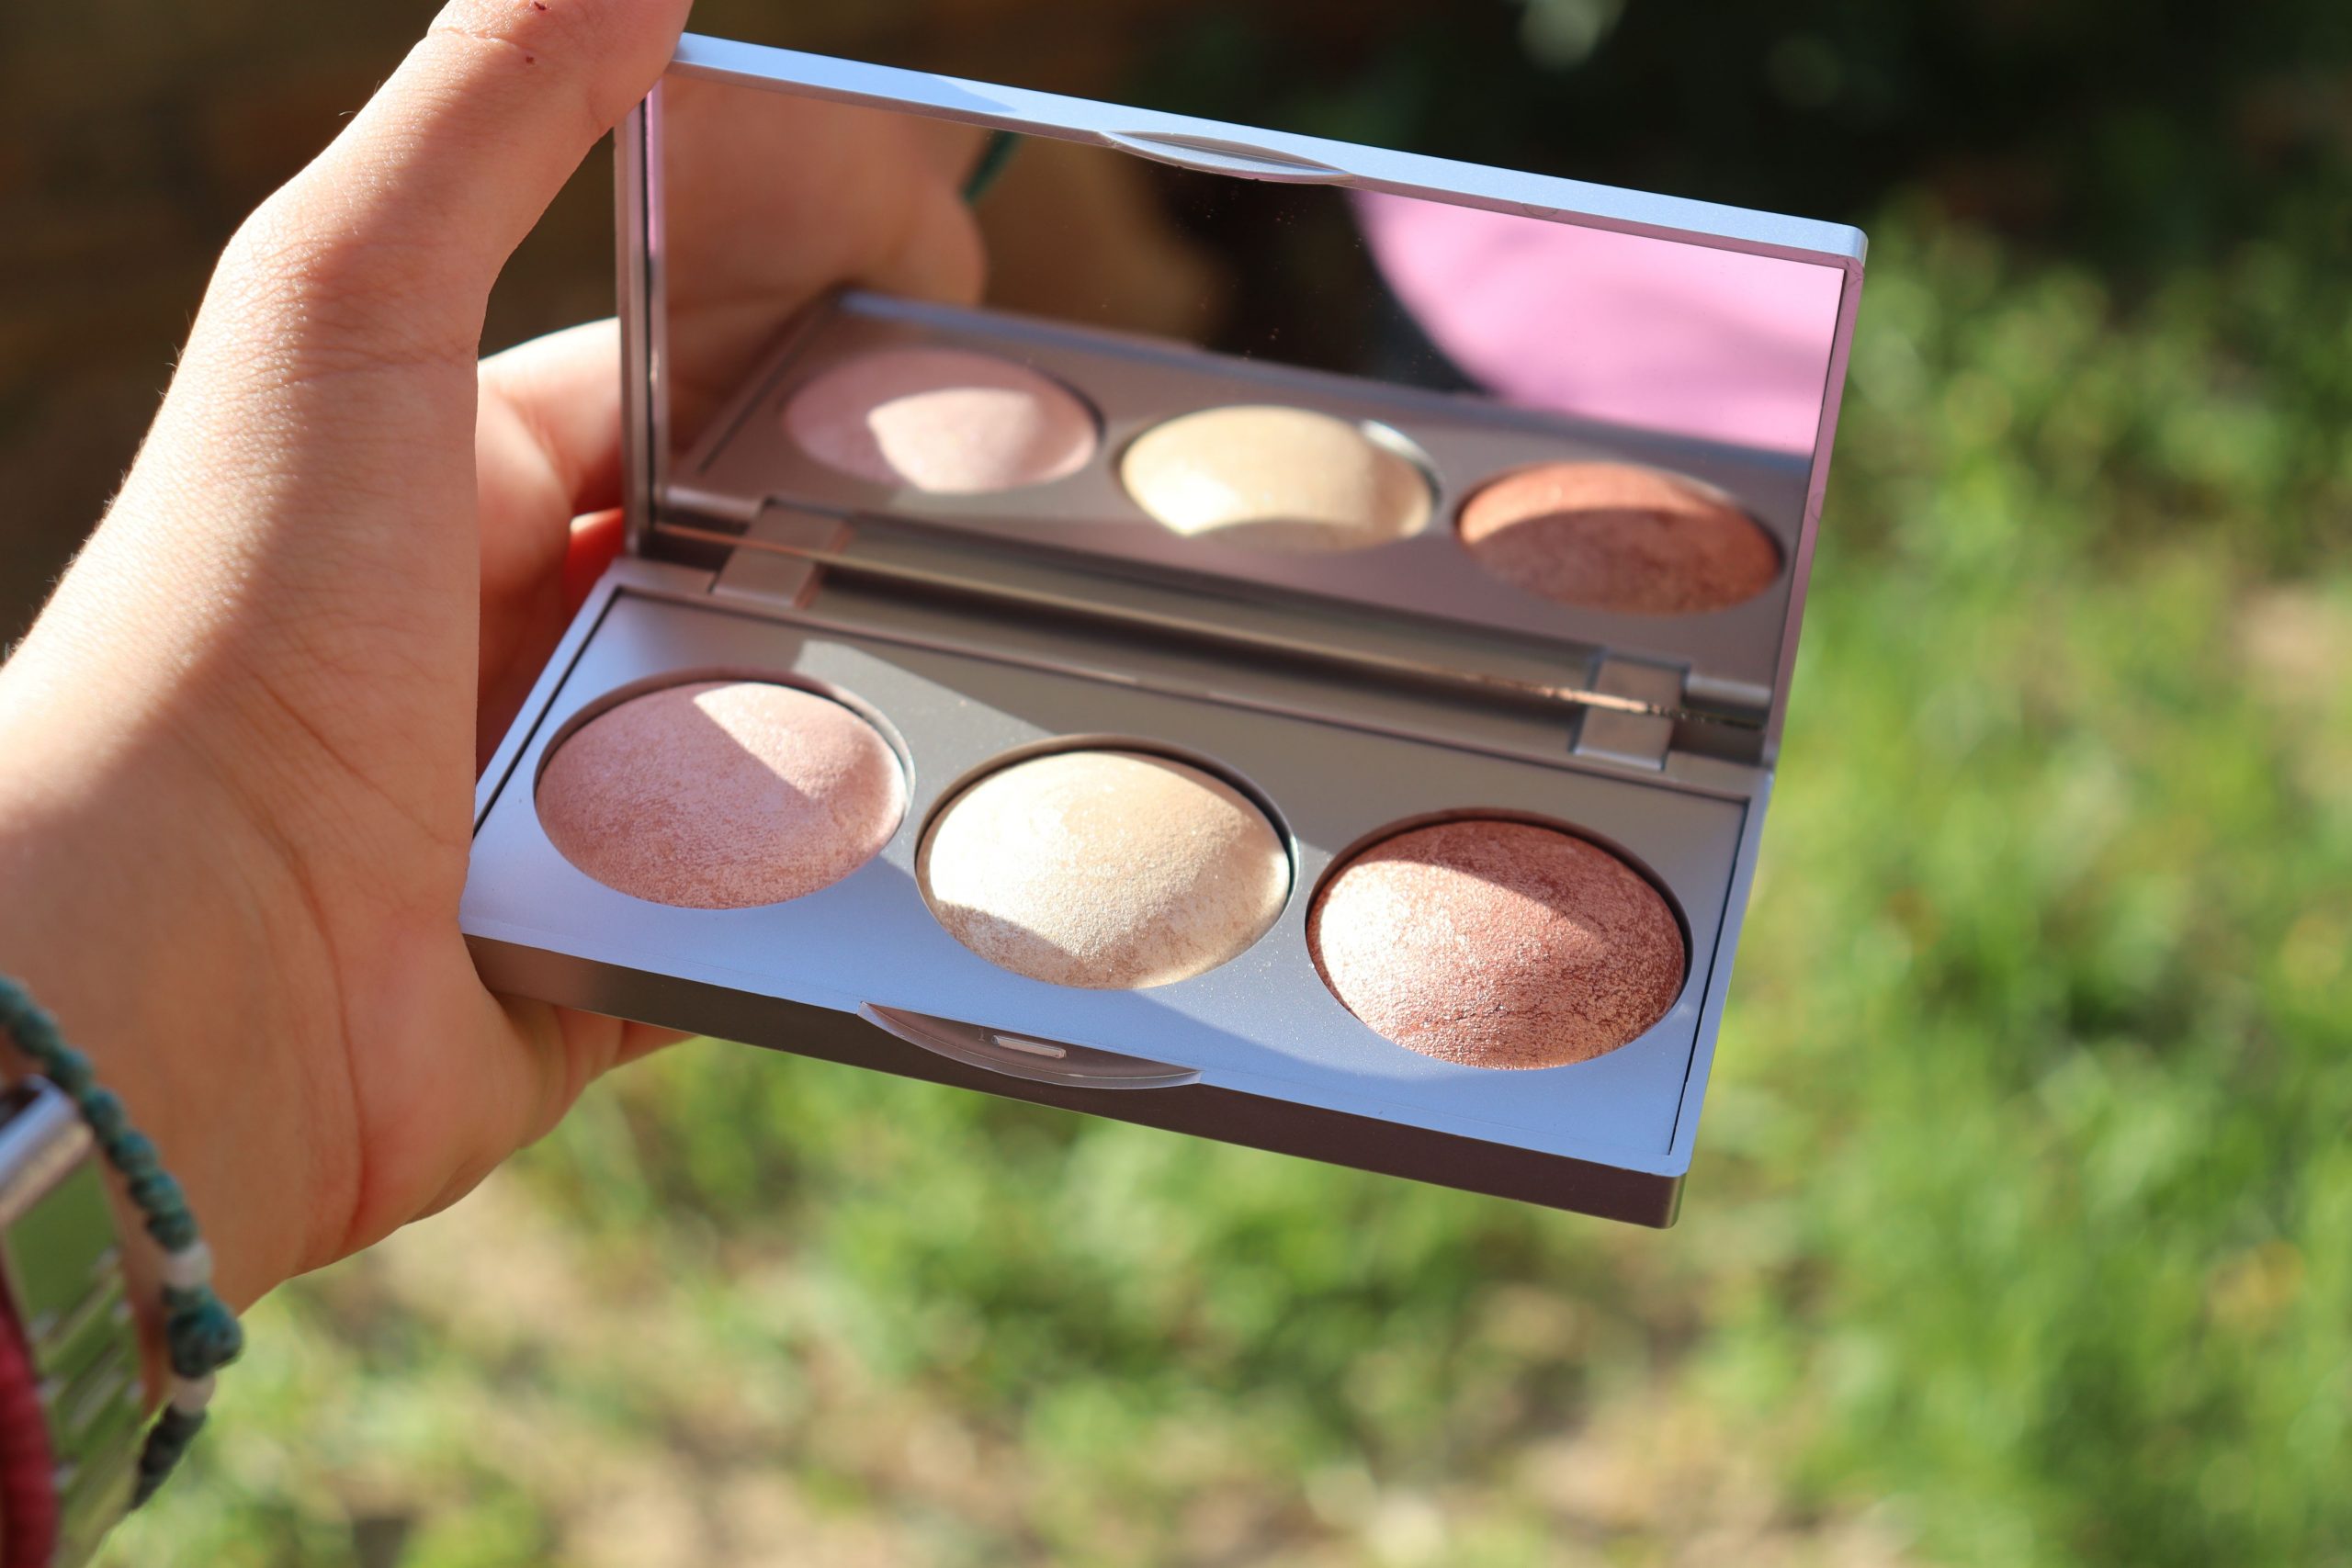
    Using both cream and powder products can improve longevity, but every layer should remain light. Apply a thin wash of cream blush or bronzer, then set it with a small amount of coordinating powder if extra staying power is needed.

    This technique works well for special plans, but it may feel excessive for an ordinary day. For a faster routine, choose either cream or powder based on your skin type and the finish you prefer.

    Cream products can create a fresh, skin-like effect, while powders may offer better oil control. Liquid stains can also provide long-lasting color, although they should be blended quickly and tested before use.

    Avoid applying too much blush at the beginning because heat can naturally increase facial redness. Build color gradually and check the result in natural light when possible.

    Make Eye Makeup More Resistant to Heat

    Eyelids can become oily in warm weather, causing eyeshadow and eyeliner to crease or transfer. Begin with a small amount of eye primer, or use a thin layer of concealer followed by translucent powder if that combination works for you.

    Long-wearing cream shadows and finely applied powder shadows are practical options. Neutral taupe, bronze, soft brown, and muted rose shades can create definition without making fading especially noticeable.

    Apply eyeliner close to the lash line rather than drawing a very thick line. Waterproof or water-resistant pencil, gel, and liquid formulas may hold up better during humid conditions.

    For additional security, press a matching powder eyeshadow over pencil liner. This can soften the line while helping it remain in place.

    Choose Mascara and Brow Products Carefully

    Waterproof mascara can be useful for very hot days, swimming, weddings, or outdoor events. However, it may require a dedicated remover and can feel drying when used frequently.

    Tubing mascara is another option. It forms small tubes around the lashes and may resist smudging while remaining easier to remove with warm water, depending on the formula.

    If mascara tends to transfer beneath your eyes, apply it mainly to the upper lashes or skip the lower lashes. Curling the lashes before mascara can provide lift without requiring several coats.

    For brows, tinted gel, waterproof pencil, or pomade can provide definition. Fill only sparse areas, then brush through the brows so the result remains soft. Heavy brow products may become more obvious if they fade unevenly.

    Set Makeup Without Making It Look Heavy

    Powder can help control shine, but applying it everywhere may leave the skin looking flat or dry. Use a small brush or powder puff to press translucent powder onto the forehead, nose, chin, and other areas where makeup tends to move.

    Pressing powder into the skin generally provides better control than sweeping on a thick layer. Leave the high points of the cheeks less powdered if you want to maintain a natural-looking glow.

    A setting spray can help the layers of makeup blend together and may improve wear. Choose a formula designed for your preferred finish, whether natural, radiant, or matte.

    Let the spray dry without touching the face. Setting spray can support longevity, but it cannot make makeup completely resistant to heavy perspiration or repeated rubbing.

    Choose Low-Maintenance Lip Color

    Heavy lipstick and sticky gloss may feel less comfortable in hot weather. Tinted lip balm, sheer lipstick, lip stain, and softly blurred matte formulas are easier options for many warm-weather plans.

    For additional definition, apply lip liner close to your natural lip color, then soften it toward the center. Add a thin layer of lipstick or balm rather than coating the lips heavily.

    Long-wearing liquid lipstick can provide durability, but some formulas may feel drying. Prepare the lips with balm, remove excess moisture before application, and follow the product instructions carefully.

    Carry your lip product for touch-ups after eating or drinking. Reapplying one comfortable product is usually easier than trying to maintain a complicated combination.

    Touch Up Without Adding More Layers

    When shine or perspiration appears, avoid immediately applying more powder. First, blot the skin gently with a clean tissue or blotting paper. Press rather than rub so you do not disturb the makeup underneath.

    After blotting, add a small amount of pressed or translucent powder only where necessary. If foundation has separated, smooth the area with a clean sponge before applying any additional product.

    A practical warm-weather touch-up kit might include:

    • Blotting papers or clean tissues
    • A small pressed powder
    • A compact sponge or puff
    • Your chosen lip product
    • A clean hair tie or clip
    • Travel-size sunscreen for appropriate reapplication

    Keep makeup out of a hot car or direct sunlight for extended periods. High temperatures can affect product texture, packaging, and stability.

    Final Thoughts

    Heatproof makeup works best when the routine remains light. Allow skincare and sunscreen to settle, apply complexion products in thin layers, use long-wearing formulas strategically, and set only the areas that need it.

    Expecting makeup to remain completely unchanged in extreme heat can create unnecessary frustration. A fresh, comfortable look that fades evenly and can be touched up easily is often the most practical choice for warm days.

    FAQs

    What type of foundation is best for hot weather?

    Lightweight, long-wearing, or water-resistant foundations and skin tints can feel more comfortable. Apply thin layers and use concealer only where additional coverage is needed.

    How can I stop makeup from sliding off in humidity?

    Use lightweight skincare, let sunscreen settle, apply primer only where needed, build makeup in thin layers, and press powder onto areas that become oily.

    Should I use powder before or after setting spray?

    Powder is generally applied before setting spray. Allow the spray to dry fully without touching the face.

    Is waterproof mascara suitable for everyday use?

    It can be used regularly if it feels comfortable, but it may require more effort to remove. Tubing or water-resistant mascara may offer a gentler alternative for some people.

    How should I touch up sweaty makeup?

    Blot perspiration and excess oil first. Smooth separated makeup with a clean sponge, then apply a small amount of powder only where needed.

    Can setting spray make makeup sweatproof?

    No product can guarantee completely sweatproof makeup. Setting spray may improve wear, but heavy perspiration, rubbing, and high humidity can still affect the finish. RECOMMENDED WORDPRESS TAG: Heatproof Makeup Tips

  • How to Make Your Makeup Last All Day Without Looking Heavy

    How to Make Your Makeup Last All Day Without Looking Heavy

    To make your makeup last all day without looking heavy, focus on thin layers, strategic placement, and formulas that suit your skin. Prepare the complexion with lightweight skincare, apply base products only where you want coverage, and set the areas most likely to crease or become shiny.

    Long-lasting makeup does not require a thick foundation or a full layer of powder. In fact, excessive product can separate, settle into texture, and become more noticeable as the day continues. A lighter base with targeted concealer, carefully blended color, and a few controlled touch-ups will often look fresher for longer.

    Prepare Your Skin With Lightweight Layers

    Makeup tends to wear more evenly when the skin feels comfortable—not overly dry, greasy, or coated in several products that have not settled.

    Begin with a gentle skincare routine suited to your skin type. Dry skin may benefit from a comfortable moisturizer, while oily or combination skin may prefer a light lotion or gel-cream texture. Apply broad-spectrum sunscreen as the final morning skincare step and allow it to form an even layer before starting your makeup.

    Using too much skincare immediately before foundation is a common cause of pilling and slipping. If your routine includes several serums, oils, creams, and sunscreen, consider saving richer products for nighttime. Your morning layers should work together without leaving a thick film.

    Primer is optional, but it can be useful when applied strategically:

    • Hydrating primer: Place it over dry or flaky-looking areas.
    • Smoothing primer: Use a small amount where pores or texture are more noticeable.
    • Mattifying primer: Concentrate it on areas that become oily, such as the forehead, nose, and chin.
    • Gripping primer: Apply a thin, even layer where makeup tends to fade.

    Avoid layering several primers over the entire face. Different areas may have different needs, and targeted preparation usually creates a more natural result.

    Build a Thin, Flexible Complexion Base

    The easiest way to prevent long-wear makeup from looking heavy is to avoid unnecessary coverage. Begin with a small amount of skin tint, foundation, or tinted moisturizer and blend it outward from the center of the face.

    The center often benefits from more evening, while the hairline and jaw usually need less product. Leaving some natural skin visible around the edges helps the base look more believable.

    Choose your application tool according to the finish you want. Fingers can work well with lightweight formulas, a brush can provide controlled coverage, and a damp sponge can soften excess product. Regardless of the tool, press and blend rather than repeatedly dragging foundation across the skin.

    If you want more coverage, wait briefly before adding a second thin layer. Place it only where the first layer is insufficient. Building gradually provides more control than applying a large amount at the beginning.

    Shade matching also affects how heavy makeup appears. Foundation that is too light, too dark, or noticeably different in undertone may remain visible even when perfectly blended. Check the shade along the jaw in natural or neutral lighting rather than relying only on the back of your hand.

    Use Concealer and Powder Only Where Needed

    Targeted concealer can create a polished complexion without covering the entire face. Apply it around the nose, on individual blemishes, beneath the eyes, or anywhere you want extra evening.

    For blemishes, use a small brush to place concealer precisely, then soften only the edges. Rubbing across the entire area can remove the coverage you just created.

    Under the eyes, concentrate concealer where darkness is most visible, often near the inner corner, rather than filling a large triangular area. Flexible, thin formulas tend to move more naturally than a thick layer of full-coverage product.

    Powder should help stabilize makeup, not hide it beneath a flat finish. Use a small fluffy brush or powder puff to set:

    • The sides of the nose
    • The center of the forehead
    • The chin
    • Areas where concealer creases
    • Places where glasses or sunglasses touch

    Press powder into areas that need durability instead of sweeping it over the entire face. If your cheeks remain comfortable and do not become oily, leaving them lightly powdered—or not powdered at all—can preserve a skin-like finish.

    A common mistake is adding more powder whenever shine appears. If oil has already developed, blot gently first. Applying powder directly over excess oil can create a thick, uneven texture.

    Layer Cheek, Eye, and Lip Color for Better Wear

    Color products can fade even when the complexion remains intact. Thoughtful layering improves durability without requiring highly pigmented or difficult-to-remove formulas.

    Blush and Bronzer

    For longer-lasting cheek color, apply a thin cream or liquid product and set it lightly with a coordinating powder. The shades do not need to match exactly, but they should blend comfortably together.

    If two layers feel excessive, choose one long-wearing formula and build it gradually. Keep blush placement slightly higher on the cheeks if makeup tends to fade near areas frequently touched by your hands or phone.

    Avoid placing a wet cream formula over a heavily powdered base. This can lift the foundation or create patches. If the complexion is already set, use powder blush and bronzer instead.

    Eyes

    Apply a thin layer of eye primer when shadow creases or disappears easily. Let it settle, then add eyeshadow in light layers. Cream shadow can serve as a base for powder, but too much cream may make the eyelids feel heavy.

    Press eyeliner close to the lashes and soften it before it sets if you prefer a natural look. Waterproof or water-resistant formulas may help in humid weather or on watery eyes, but they still need to be removed gently at the end of the day.

    Apply mascara in controlled coats, allowing a brief pause between them. Repeatedly brushing nearly dry mascara through the lashes can create clumps and flakes.

    Lips

    For comfortable, lasting lip color, outline and lightly fill the lips with a pencil, then apply a thin layer of lipstick. Blot once and add a second light layer where needed.

    Long-wear liquid lipstick can offer greater durability, but it may feel dry on some lips. A satin lipstick over pencil often provides a more flexible compromise. Keep balm application light immediately before lipstick, as a slippery layer can reduce wear time.

    Plan Touch-Ups That Preserve the Original Finish

    All-day makeup rarely means makeup that never changes. Heat, facial movement, meals, natural oils, and contact with clothing can affect even long-wearing products. The goal is to make small corrections without repeatedly building new layers.

    Carry only the products you are likely to use:

    • Blotting papers or a clean tissue
    • A small pressed powder
    • Your lip color or tinted balm
    • A compact mirror
    • A clean sponge or small puff

    When the complexion becomes shiny, blot before adding powder. Press gently rather than rubbing, which can move foundation. Add a minimal amount of powder only to the affected areas.

    If foundation separates around the nose or chin, smooth the existing product with a clean fingertip or sponge before adding anything else. Often the makeup can be redistributed without another layer.

    For fading blush, use the small amount remaining on your brush or apply a sheer powder blush. Avoid placing a concentrated spot of cream color over a face that has become oily or heavily powdered.

    Refresh lipstick by removing loose or uneven color first. Applying fresh lipstick over several worn layers can make the lips look thick and dry. A little balm followed by a thin layer of color usually looks cleaner.

    Setting spray may help the makeup layers appear more blended and can support wear depending on the formula. Hold it at the recommended distance and allow it to dry naturally. Excessive mist can create droplets or disturb mascara, so follow the product directions.

    Common Mistakes That Make Long-Wear Makeup Look Heavy

    Long-lasting makeup becomes heavy when every step is treated as an opportunity for maximum coverage. Primer, foundation, concealer, powder, contour, and setting spray can work together, but none needs to be applied excessively.

    Watch for these common mistakes:

    • Using too much skincare: Thick morning layers can make foundation slide or pill.
    • Applying full coverage everywhere: Most complexions need different amounts in different areas.
    • Adding concealer before assessing the foundation: This can create unnecessary overlap.
    • Powdering dry areas heavily: Excess powder may emphasize texture as the day continues.
    • Mixing incompatible layers: Some combinations separate even when each product works well alone.
    • Skipping time between steps: Products need a moment to settle before another layer is added.
    • Touching up without blotting: Powder applied directly over oil can become cakey.
    • Using unclean tools: Product buildup may affect blending and color payoff.

    Test new combinations before an important event. Wear the makeup for several hours and check it in daylight, indoor lighting, and photographs. If the base separates, change one element at a time so you can identify the problem.

    Final Thoughts

    The most effective way to make your makeup last all day without looking heavy is to use less product in more precise places. Prepare the skin with lightweight layers, build foundation gradually, and use concealer only where additional coverage is useful.

    Set areas that crease or become oily while leaving comfortable parts of the face more natural. Layer color thoughtfully, blot before touching up, and choose formulas that fit your skin type, climate, and schedule.

    Durability does not have to mean a flat or mask-like finish. When each layer has a clear purpose, makeup can remain polished while still looking flexible, dimensional, and like your own skin.

    Frequently Asked Questions

    Should I use primer to make makeup last longer?

    Primer can help, but it is not essential for everyone. Apply the appropriate type only to areas where dryness, oil, texture, or fading is a concern.

    How do I stop foundation from separating around my nose?

    Use lighter skincare in that area, apply a thin layer of foundation, and press a small amount of powder around the nose. Blot before touching up later.

    Is setting spray better than setting powder?

    They serve different purposes. Powder controls shine and sets targeted areas, while setting spray may help layers look more blended and support overall wear.

    How can I make makeup last on oily skin without looking cakey?

    Use lightweight layers, apply mattifying products only where needed, and blot away oil before adding a small amount of powder.

    Why does my makeup pill during application?

    Pilling may result from excessive skincare, incompatible formulas, or insufficient time between layers. Simplify the routine and test one product combination at a time.

    How can I refresh dry-looking makeup during the day?

    Gently press the area with a clean, slightly damp sponge and avoid adding more powder. A light mist may help, provided the formula works with your makeup.

  • How to Choose the Right Sunscreen for Your Skin Type and Daily Routine

    How to Choose the Right Sunscreen for Your Skin Type and Daily Routine

    The right sunscreen is one you can apply generously, wear comfortably, and reapply when needed. For most adults, a practical starting point is a broad-spectrum sunscreen with SPF 30 or higher. From there, choose the texture, finish, and water resistance based on your skin type and daily activities.

    Dry skin may feel better with a moisturizing cream, while oily skin may prefer a lightweight fluid or gel. Sensitive skin can be worth pairing with a fragrance-free mineral formula, and tinted sunscreen may help reduce visible white cast while fitting more naturally into a makeup routine. The label matters, but so does real-life wearability: an excellent sunscreen offers little value if its texture makes you avoid using enough.

    Understand the Sunscreen Label First

    Packaging can be crowded with claims, so begin with the information that directly affects protection.

    Broad spectrum means the sunscreen is formulated to protect against both UVA and UVB rays. UVB is strongly associated with sunburn, while UVA can contribute to visible skin aging and long-term skin damage. An SPF number alone does not tell you whether a product provides broad-spectrum coverage, so look for both terms.

    SPF 30 or higher is a useful everyday standard. A higher SPF can provide an additional margin of protection, but it does not last all day or compensate for applying too little. SPF 50 still requires even application and appropriate reapplication.

    Water resistant matters when you will swim, exercise, sweat, or spend an extended period outdoors. In the United States, the label should indicate whether the tested water-resistance period is 40 or 80 minutes. No sunscreen is completely waterproof, and toweling off can remove some of the product.

    Also check the directions and active ingredients. Sunscreen regulations and available filters differ between countries, so a formula sold in one region may not have the same label or ingredients as a similarly named product sold elsewhere.

    Choose the Right Sunscreen for Your Skin Type

    Skin type does not determine one universally correct formula, but it can help you narrow the options. Consider how your skin feels during the day and how sunscreen behaves beneath any makeup you wear.

    Dry Skin

    Look for cream or lotion textures that provide a comfortable finish. Formulas containing moisturizing ingredients such as glycerin, hyaluronic acid, ceramides, or squalane may help sunscreen sit more smoothly over dry areas.

    If your sunscreen already feels sufficiently moisturizing, you may not need a separate daytime moisturizer. If your skin remains tight, apply moisturizer first, let it settle, and then add sunscreen as the final skincare step.

    Avoid assuming that a very dewy finish is automatically better. Excessively rich layers can pill or cause makeup to slide, so balance comfort with how the product performs during your day.

    Oily or Combination Skin

    Lightweight fluids, gels, and thin lotions often feel easier to wear. Labels such as “oil-free,” “non-comedogenic,” or “matte finish” can be useful starting points, although individual results vary.

    You do not need to make the entire face completely matte. A natural-finish sunscreen may be comfortable if you lightly powder the forehead, nose, and chin afterward. For combination skin, apply less moisturizer to oilier areas rather than expecting sunscreen to correct every difference in texture.

    Acne-Prone Skin

    Look for a non-comedogenic formula and avoid introducing several unfamiliar skincare products at the same time. A lighter texture may feel preferable, but “lightweight” does not guarantee that every ingredient will suit every person.

    If a sunscreen appears to contribute to clogged pores or irritation, stop using it and test a different formula. Persistent or severe breakouts are best discussed with a qualified dermatologist.

    Sensitive or Easily Irritated Skin

    A fragrance-free mineral sunscreen containing zinc oxide, titanium dioxide, or both can be worth considering. Mineral formulas may be more comfortable for some sensitive complexions, although any product can potentially cause a reaction.

    “Unscented” and “fragrance-free” do not always mean the same thing. Unscented products may contain ingredients used to mask an odor, so read the label carefully. Patch-test an unfamiliar formula on a small area before using it widely, especially if your skin is reactive.

    Skin Prone to Visible Dark Spots

    A tinted broad-spectrum sunscreen may be particularly useful. Tinted formulas containing iron oxides can offer added protection from visible light, which may contribute to the appearance of hyperpigmentation in some people. They can also minimize the white or gray cast that certain mineral sunscreens leave on deeper skin tones.

    The best tint should blend naturally into your complexion. If one universal shade looks orange, pink, or ashy, search for a formula available in multiple tones rather than trying to correct it with heavy foundation.

    Match the Formula to Your Daily Routine

    Your schedule matters as much as your skin type. The sunscreen you enjoy for an indoor workday may not be suitable for a beach trip or outdoor workout.

    Mostly Indoor Days

    Choose a comfortable broad-spectrum SPF 30 or higher that layers well with your morning skincare and makeup. Pay attention to incidental exposure from commuting, walking outside, sitting near bright windows, or completing errands.

    A moisturizer with sunscreen can be convenient if it provides adequate broad-spectrum SPF and you apply enough. If you tend to use only a tiny amount of moisturizer, a separate sunscreen may make consistent coverage easier.

    Makeup Days

    Look for a sunscreen that settles without remaining excessively slippery. Thin lotions and fluids often work well, but the ideal finish depends on your foundation.

    Allow sunscreen to form an even layer before applying makeup. Press or gently blend foundation rather than rubbing repeatedly. If products pill, reduce the number of skincare layers and check whether silicone-heavy, oil-rich, or water-based textures are interacting poorly.

    Powder, mist, or cushion SPF products can be convenient for touch-ups, but it may be difficult to apply enough of them to replace a complete base layer. Treat them as supportive options rather than assuming a light dusting provides full coverage.

    Outdoor Exercise and Humid Weather

    Select a water-resistant formula and check whether the label specifies 40 or 80 minutes. A product that grips the skin well may be more useful than a highly moisturizing formula during heavy sweating.

    Apply it before going outdoors and reapply according to the label, particularly after sweating, swimming, or toweling off. Remember exposed areas such as the ears, hairline, back of the neck, shoulders, and hands.

    Beach, Pool, and Extended Outdoor Days

    Use broad-spectrum, water-resistant sunscreen with SPF 30 or higher and combine it with shade, protective clothing, a wide-brimmed hat, and sunglasses. Sunscreen is one part of sun protection, not a reason to extend exposure indefinitely.

    A lotion is often practical for creating an even base over the body. Sticks can be useful around the face or for targeted reapplication, while sprays can help cover hard-to-reach areas. With sprays, apply enough to make coverage visible before rubbing it in, avoid inhaling the mist, and do not spray directly onto the face.

    Mineral, Chemical, or Hybrid: Which Should You Choose?

    Mineral sunscreens use zinc oxide, titanium dioxide, or both as active ingredients. Chemical sunscreens use other approved UV filters, while hybrid formulas combine mineral and chemical filters.

    All three types can provide effective protection when they are broad spectrum, applied correctly, and used as directed. The best category depends mainly on comfort, finish, availability, and how your skin responds.

    • Mineral sunscreen: May suit sensitive skin, but some formulas can feel thicker or leave a visible cast.
    • Chemical sunscreen: Often available in lightweight, transparent textures, although certain formulas may sting sensitive skin or eyes.
    • Hybrid sunscreen: Can balance cosmetic elegance with mineral coverage, depending on the specific formulation.

    Do not judge a sunscreen only by its filter category. Two mineral formulas can feel completely different, just as two chemical formulas can have different finishes and levels of eye comfort.

    If sunscreen repeatedly burns around your eyes, use a formula specifically intended for the face, avoid applying too close to the lash line, or try a mineral stick around the eye area. Stop use and seek professional guidance if significant irritation, swelling, or a persistent rash develops.

    Apply Enough and Reapply Realistically

    Even a well-chosen sunscreen cannot perform as labeled when applied too thinly or unevenly. Follow the directions on your product and cover all skin not protected by clothing.

    For the face, include the hairline, temples, ears, jaw, and neck. Apply lip balm with SPF to the lips, and remember the chest and backs of the hands when exposed. If you are concerned about disturbing the first layer, apply sunscreen in two thinner passes to improve evenness.

    Apply sunscreen before sun exposure according to the label. When outdoors, reapply approximately every two hours, as well as after swimming, heavy sweating, or toweling. Water-resistant products should be reapplied at the 40- or 80-minute interval specified during swimming or sweating.

    Indoor reapplication depends on your day. Someone remaining away from windows may have different exposure than someone commuting, sitting beside a sunny window, or moving indoors and outdoors. Plan reapplication around actual exposure while following the product directions.

    Common mistakes include:

    • Using a high SPF as a reason to apply less
    • Missing the ears, neck, hairline, and hands
    • Relying on foundation with SPF when only a small amount is applied
    • Assuming water-resistant means waterproof
    • Keeping sunscreen in excessive heat or direct sunlight
    • Using a product after its expiration date or after its texture or smell changes
    • Expecting sunscreen alone to replace shade and protective clothing

    Final Thoughts

    Choosing the right sunscreen begins with broad-spectrum protection, SPF 30 or higher, and a formula you can use generously. After those essentials, match the texture to your skin type and the level of water resistance to your daily routine.

    Dry skin may prefer a moisturizing cream, oily skin may feel more comfortable with a fluid or gel, and sensitive skin may benefit from considering a fragrance-free mineral option. Tinted sunscreen can be helpful when visible cast or dark spots are concerns.

    Give yourself permission to try more than one formula. Many people prefer a lightweight facial sunscreen for ordinary days and a water-resistant lotion for outdoor activities. Consistent use matters more than finding one product that performs perfectly in every situation.

    Frequently Asked Questions

    Is SPF 30 enough for everyday use?

    SPF 30 or higher is a practical everyday standard when the product is broad spectrum and applied generously. Higher SPF does not eliminate the need for reapplication.

    Should sunscreen go before or after moisturizer?

    Apply moisturizer first if you need it, then use sunscreen as the final skincare step before makeup. Allow each layer to settle to reduce pilling.

    Can I skip sunscreen if my foundation contains SPF?

    Foundation is rarely applied in the amount needed for reliable, even coverage. A dedicated sunscreen underneath makeup is generally a more dependable approach.

    Is mineral sunscreen always better for sensitive skin?

    Not always, but fragrance-free zinc oxide or titanium dioxide formulas may be worth considering. Patch-test unfamiliar products because sensitivity varies.

    How often should I reapply sunscreen?

    When outdoors, reapply about every two hours and after swimming, sweating, or toweling. Follow the specific directions and water-resistance interval on the label.

    Can darker skin tones get sun damage?

    Yes. Every skin tone can be affected by UV exposure. Tinted broad-spectrum sunscreen may offer a more natural finish and can be useful for people concerned about visible dark spots.

  • Fresh Spring Makeup Ideas for a Natural, Healthy-Looking Glow

    Fresh Spring Makeup Ideas for a Natural, Healthy-Looking Glow

    Fresh spring makeup is less about covering your features and more about using light, well-placed color to create a rested, healthy-looking glow. Start with comfortable skin preparation, apply complexion products only where you want extra coverage, and choose one or two fresh shades for the cheeks, lips, or eyes.

    The result should still look like you. Natural makeup does not require perfectly clear skin, and glowing makeup does not mean making every part of the face shiny. A balanced mix of sheer coverage, soft definition, and controlled luminosity usually looks more polished—and is often easier to wear as the weather becomes warmer.

    Prepare Your Skin Without Overloading It

    Fresh makeup begins with skin that feels comfortable. A complicated preparation routine is not necessary, especially if several layers cause your base to pill, separate, or move during the day.

    Begin with your usual gentle skincare. If your skin feels drier, a comfortable moisturizer may help foundation blend more evenly. If it becomes oilier in warmer weather, you might prefer a lighter lotion or gel-cream texture. Allow each layer to settle before applying the next one.

    During the day, apply broad-spectrum sunscreen as the final step of your morning skincare. Give it time to form an even layer before beginning your makeup. Rubbing foundation aggressively over sunscreen can disturb both products, so use light pressing or blending motions.

    Primer is optional. A hydrating primer may be useful on areas that tend to look dry, while a smoothing or shine-controlling formula can be placed around the nose, forehead, or other areas where makeup fades quickly. Applying different primers only where they are needed can work better than coating the entire face with one finish.

    If products repeatedly roll into small flakes, the issue may be too many layers, incompatible textures, or insufficient time between steps. Simplify the routine and test one combination at a time.

    Create a Sheer, Even-Looking Complexion

    A natural base does not need to erase freckles, texture, or every variation in skin tone. Its purpose is to make the complexion appear more balanced while preserving dimension.

    Choose a skin tint, light-coverage foundation, or your usual foundation applied in a thinner layer. Begin at the center of the face, where redness and unevenness are often more noticeable, and blend outward. Use less product around the hairline and jaw so the finish fades naturally into the skin.

    For targeted coverage, place concealer only where you want it: around the nose, on individual blemishes, or beneath the eyes. A small brush can provide precise coverage without building a thick layer across a larger area.

    Under the eyes, apply concealer sparingly and concentrate it where darkness is most visible rather than creating a large triangle. Choose a flexible formula and avoid excessive powder, which can make the area look heavier than intended.

    Check your makeup near a window or in neutral lighting before adding more coverage. Bathroom lighting can sometimes make the complexion appear less even than it does in daylight, encouraging unnecessary layers.

    Use Blush to Create a Fresh Spring Makeup Look

    Blush is one of the quickest ways to bring life back to the face. Spring-friendly shades include soft peach, warm rose, clear pink, muted coral, and gentle berry. The most flattering option is the one that works with your skin tone and feels comfortable with the rest of your makeup.

    Cream and liquid blushes can create a sheer, skin-like finish, but they require a light hand. Place a small amount on the back of your hand first, then pick it up with a brush or fingertip. This gives you more control than applying a highly pigmented formula directly to the cheeks.

    Powder blush can look equally fresh when applied with a soft brush in thin layers. Tap away excess product and build the color gradually.

    Placement can subtly change the overall effect:

    • For a lifted appearance: Blend blush slightly upward along the outer cheekbones.
    • For a soft, youthful effect: Place color on the rounded area of the cheeks and diffuse the edges carefully.
    • For a sun-touched look: Sweep a very small amount across the upper cheeks and lightly over the bridge of the nose.
    • For a sculpted finish: Keep the blush higher and avoid bringing it too close to the center of the face.

    Do not feel obligated to follow one placement rule. Face shape, product intensity, and personal preference matter more than a fixed technique.

    Add Controlled Glow in the Right Places

    Healthy-looking glow comes from contrast. If the forehead, nose, cheeks, and chin are all equally reflective, the makeup may appear oily rather than luminous. Keep some areas softly radiant and others more balanced.

    A subtle cream or liquid highlighter can be tapped onto the tops of the cheekbones, above the brow arch, or lightly on the inner corners of the eyes. Choose a formula with a fine sheen if you want a natural effect; visible glitter usually creates a more decorative finish.

    You can also create luminosity without a separate highlighter. A satin-finish foundation, softly reflective blush, or a small amount of facial mist may provide enough glow. Using several radiant products at once can make texture more noticeable, so select the step that gives you the level of light you prefer.

    Powder only where needed. A small brush offers more control than a large face brush and lets you target the sides of the nose, center of the forehead, and chin while leaving the cheekbones fresh.

    If your skin naturally becomes shiny, you can still wear glowing makeup. Keep the luminous products on the outer cheeks and use a light layer of powder through the center of the face. Blotting papers can reduce excess shine later without adding another layer of makeup.

    Choose Soft Color for the Eyes and Lips

    Spring eye makeup can feel fresh without relying on bright pastels. Soft taupe, warm beige, muted rose, peach, bronze, and pale gold can add gentle definition while remaining easy to combine with everyday clothing.

    Apply one shade across the lid and blend the edges for a simple wash of color. A slightly deeper tone close to the lashes can add dimension without creating a full smoky eye. Satin textures catch the light softly, while matte shadows provide understated definition.

    Brown eyeliner often creates a gentler effect than black. Press it close to the upper lashes rather than drawing a thick line, then soften it with a small brush if desired. Black liner remains a good option when you prefer stronger contrast.

    Finish the eyes with curled lashes and a light coat of mascara. Comb through any clumps before the formula dries. For brows, brush the hairs into place and fill only obvious gaps. Heavy, sharply outlined brows may compete with an otherwise airy look.

    On the lips, tinted balms, sheer lipsticks, and comfortable glosses complement natural spring makeup. Try rose, peachy nude, pink-brown, soft coral, or translucent berry. For a blurred finish, apply color to the center of the lips and press it outward with a fingertip.

    If you want the face to feel coordinated, choose lip and cheek colors from the same general family. They do not need to match exactly; a shared warm, cool, or neutral undertone is often enough.

    Adapt the Look to Your Skin Type and Schedule

    Natural-looking makeup is not one fixed formula. The products and techniques should reflect how your skin behaves and how long you need the makeup to last.

    For Dry or Dehydrated-Looking Skin

    Use comfortable skincare and apply base products in thin layers. Limit powder to areas where makeup creases or transfers. If patches remain visible, adding more foundation may emphasize them; gently press the area with a slightly damp sponge instead.

    For Oily or Combination Skin

    Choose lightweight layers and place shine-controlling products strategically. Set the center of the face while preserving a softer finish on the cheeks. Long-wearing makeup can still look natural when applied sparingly.

    For Sensitive or Blemish-Prone Skin

    Avoid introducing several unfamiliar products at once. Use clean tools and remove makeup gently at the end of the day. If irritation or persistent skin concerns occur, discontinue products that appear to cause discomfort and consider consulting a qualified dermatologist.

    For Busy Mornings

    Build the look around five dependable steps: sunscreen, targeted concealer, blush, brow gel or mascara, and tinted lip balm. Keeping these products together can make the routine easier to repeat.

    Common Mistakes That Can Make Fresh Makeup Feel Heavy

    The most common mistake is adding more product before properly blending the first layer. Work with small amounts, step back from the mirror, and evaluate the overall balance before continuing.

    Other issues to watch for include:

    • Using a base shade that does not blend naturally into the neck or surrounding skin
    • Applying too much concealer beneath the eyes
    • Layering luminous primer, radiant foundation, highlighter, and face mist together
    • Choosing blush that is highly pigmented and applying it directly to the face
    • Powdering the entire complexion heavily, then trying to restore glow with more highlighter
    • Using an overly dark brow product with otherwise soft makeup
    • Forgetting to blend around the nose, hairline, ears, and jaw

    Clean brushes and sponges also make a difference. Product buildup can affect blending and color payoff. Wash reusable tools regularly, allow them to dry completely, and replace anything that develops an unusual smell or damaged texture.

    Final Thoughts

    The most wearable fresh spring makeup ideas rely on thoughtful placement rather than a long product list. Prepare the skin comfortably, keep complexion coverage sheer, and use blush to add soft color. A controlled highlight, lightly defined eyes, and a translucent lip shade can complete the look without hiding your natural features.

    Treat these ideas as flexible starting points. Adjust the finish for your skin type, choose colors you genuinely enjoy, and simplify any step that makes the routine feel demanding. A healthy-looking glow should feel polished but believable—like your everyday beauty routine with a little more light and freshness.

    Frequently Asked Questions

    What makeup product makes the biggest difference in a fresh spring look?

    Blush often creates the most immediate change. A sheer peach, rose, pink, or berry shade can bring warmth and dimension to a simple complexion.

    Can I create glowing makeup if I have oily skin?

    Yes. Keep luminous products on the cheekbones and set the forehead, nose, and chin lightly with powder. This preserves contrast without making the entire face reflective.

    Should spring foundation be lighter than winter foundation?

    Your foundation should continue matching your current skin tone. You may prefer a lighter texture or thinner application, but do not intentionally choose a paler shade for spring.

    How can I make full-coverage foundation look more natural?

    Use a small amount, blend it outward from the center of the face, and add a second thin layer only where needed. Avoid applying maximum coverage everywhere.

    Which lipstick colors work well for natural spring makeup?

    Soft rose, peachy nude, pink-brown, coral, and sheer berry are versatile choices. Select a depth and undertone that complement your complexion and blush.

    How can I keep fresh makeup from fading in warmer weather?

    Use thin layers, set areas that become oily, and choose longer-wearing formulas where necessary. Carry blotting papers or a small amount of powder for targeted touch-ups.

  • Soft Romantic Makeup: A Fresh, Wearable Look for Date Nights and Special Plans

    Soft Romantic Makeup: A Fresh, Wearable Look for Date Nights and Special Plans

    Soft romantic makeup is less about creating a dramatic transformation and more about enhancing the features that already make you feel like yourself. The finished look should feel fresh, luminous, and polished enough for a date night, dinner celebration, or any plan that calls for a little extra intention.

    The beauty of a soft romantic makeup look is its flexibility. You can keep it light and natural with sheer skin tint and rosy balm, or add a little more definition through softly blended eyeshadow, fluttery lashes, and a comfortable lip color. The key is choosing gentle tones and blending every step until nothing looks harsh.

    Start With Fresh, Comfortable Skin

    A romantic makeup look usually begins with skin that appears rested and cared for rather than heavily covered. Start with your usual skincare routine and give moisturizer a moment to settle before applying makeup. If your skin tends to become dry, a hydrating primer or a small amount of facial balm on dry areas may help foundation apply more smoothly.

    Choose a base that matches the level of coverage you genuinely enjoy. A skin tint, light foundation, or medium-coverage foundation can all work beautifully. Apply it in thin layers, concentrating on areas where you want more evenness. A damp makeup sponge, foundation brush, or clean fingertips can help keep the result soft and natural.

    Use concealer only where it is useful, such as around the inner corners of the eyes, over redness, or on a blemish. Applying too much concealer everywhere can make the skin look less fresh, especially under evening lighting.

    Choose a Soft Romantic Makeup Color Story

    For soft romantic makeup, colors tend to work best when they have warmth, softness, or a slightly muted quality. Think rose, peach, soft berry, champagne, warm taupe, dusty mauve, and gentle brown. You do not need to use every shade at once. A cohesive look often comes from repeating a similar undertone across the cheeks, eyes, and lips.

    If you prefer a classic approach, pair warm neutral eyes with peachy blush and a rosy nude lip. For a cooler mood, try mauve eyeshadow, pink blush, and a soft berry stain. If your outfit is already colorful or detailed, keeping the makeup in neutral rosy tones can create a more balanced result.

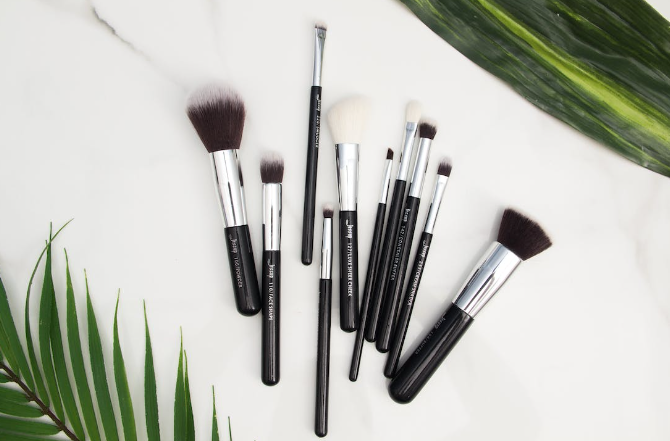
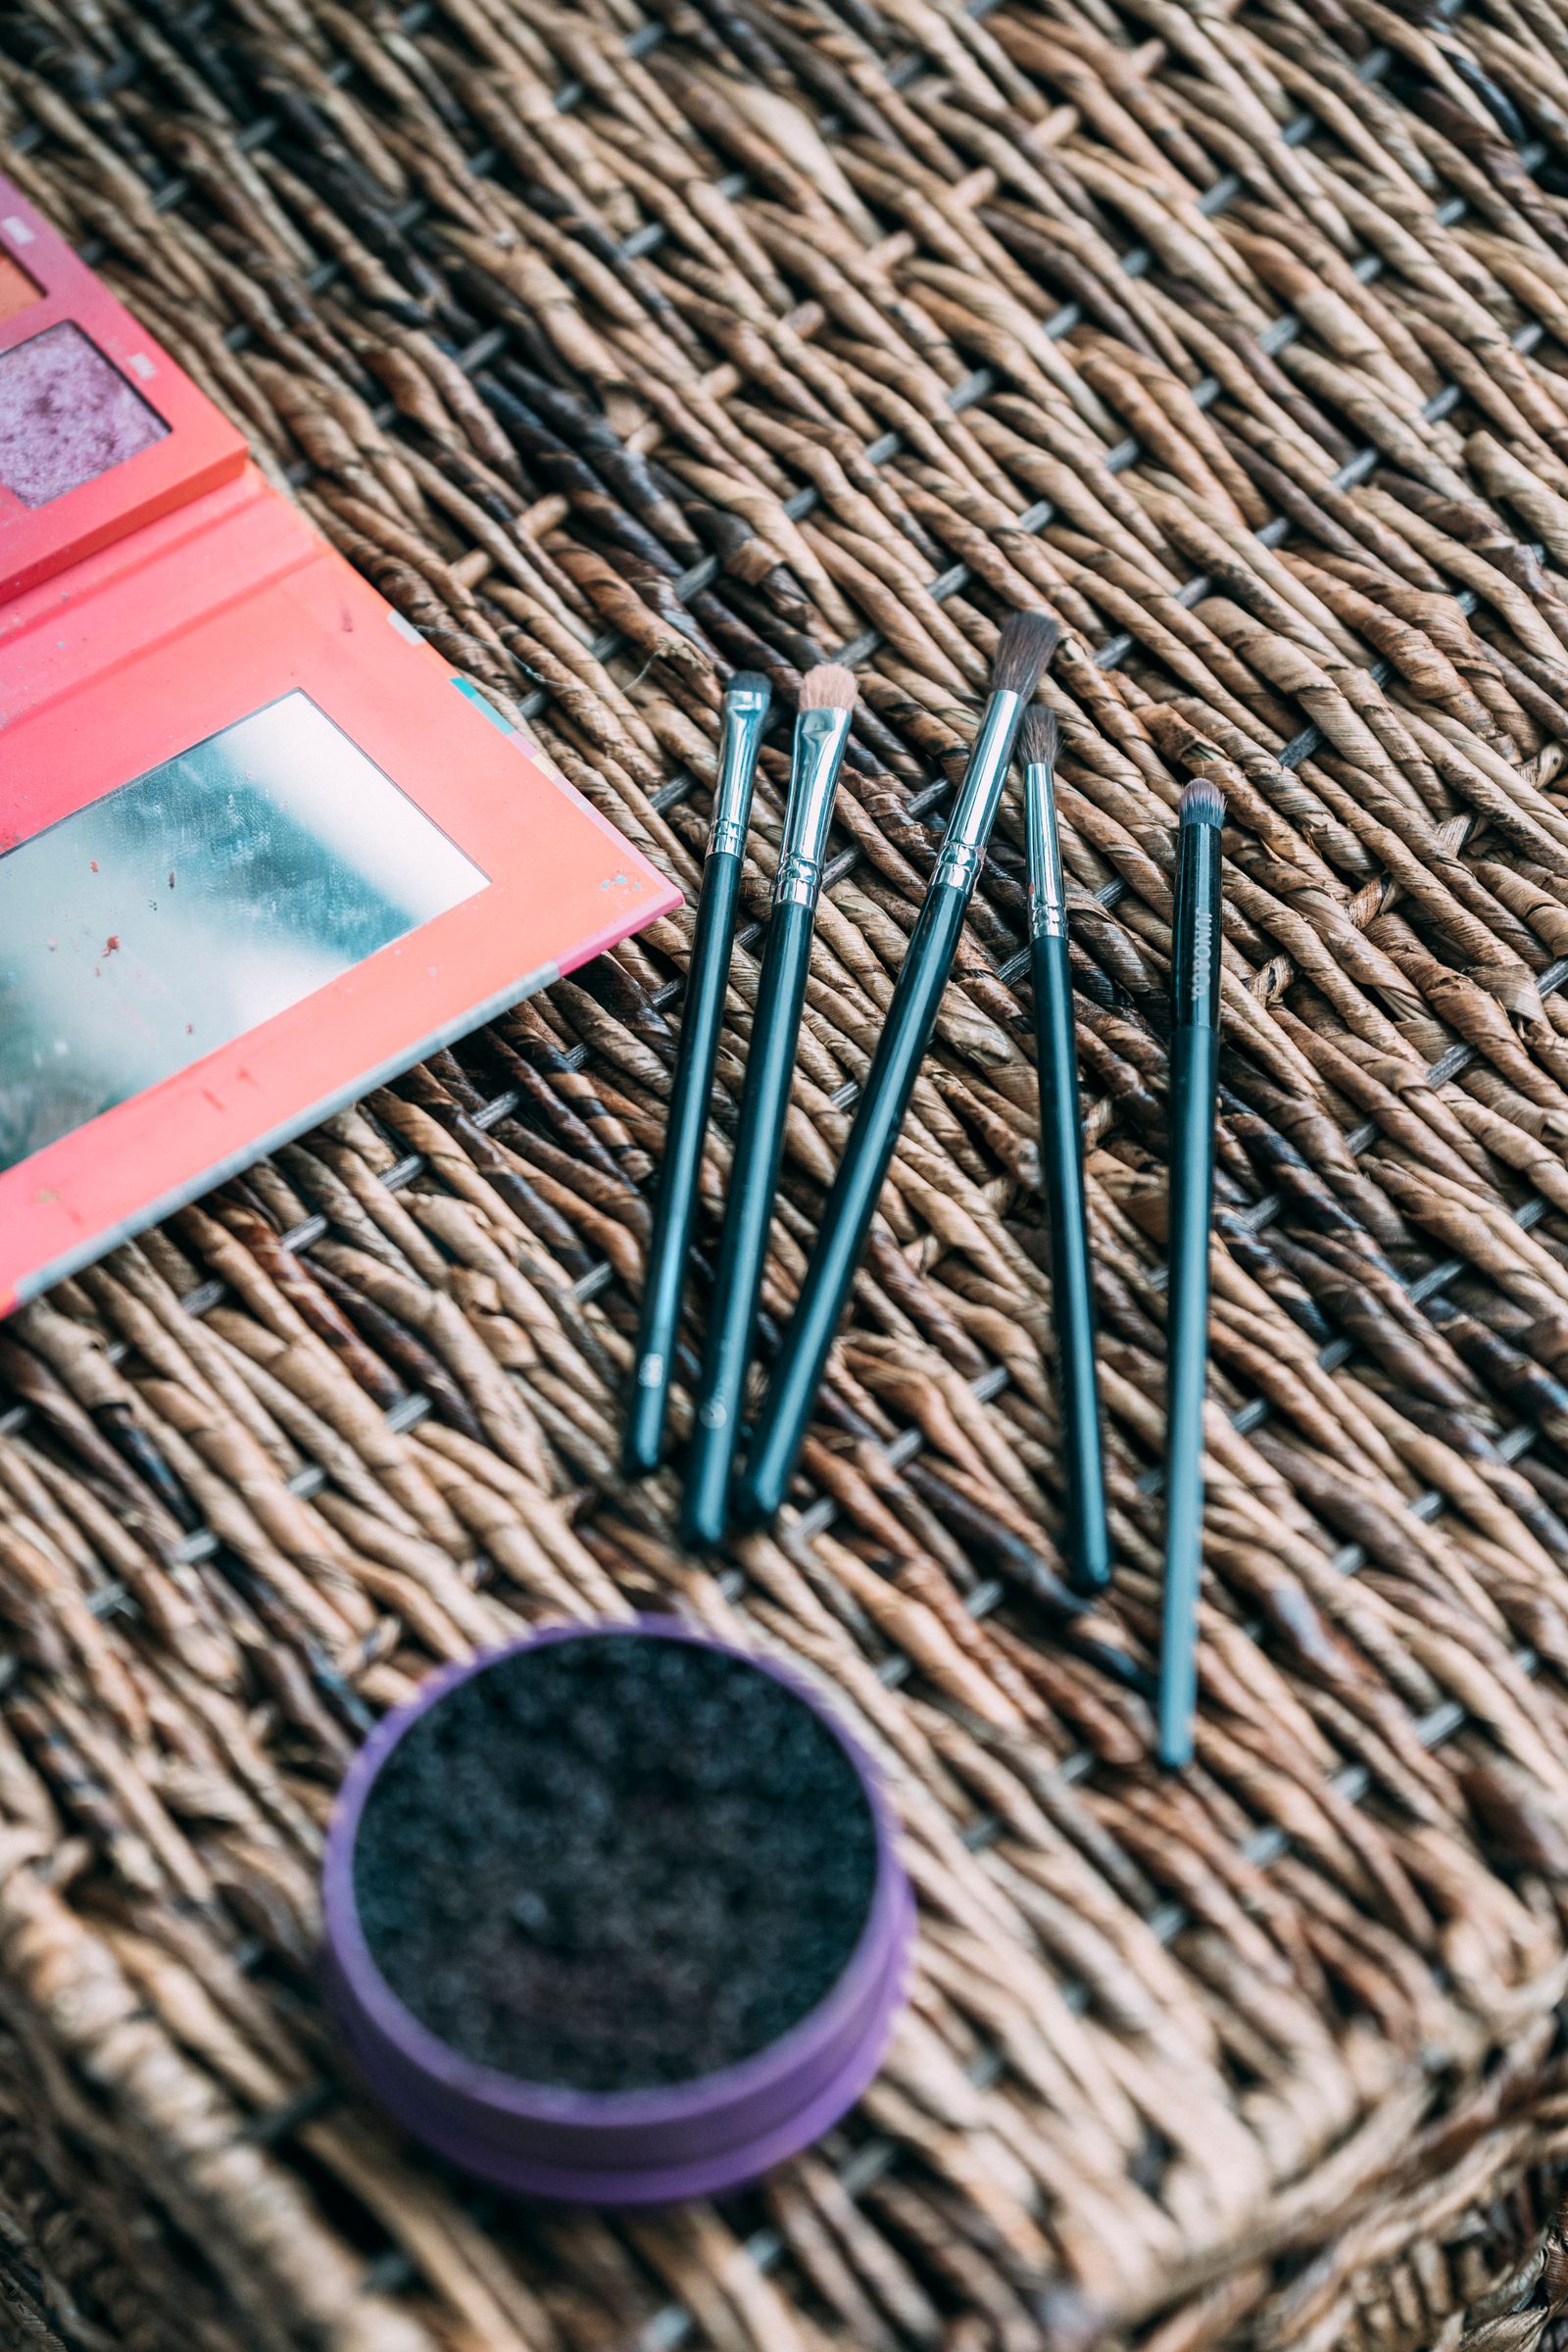
    Makeup brushes and a soft eyeshadow palette arranged for an eye makeup look

    Create Softly Defined Eyes

    Eyes are often the focal point of a romantic makeup look, but they do not need sharp lines or intense color. Begin with a matte neutral shade close to your natural skin tone to create an even base. Sweep a soft taupe, muted rose, or warm brown through the crease, then blend the edges until the transition looks seamless.

    Add a subtle shimmer to the center of the lid or inner corner if you want a little light-catching detail. Champagne, pale gold, soft pink, and satin beige shades can brighten the eyes without appearing overly glittery. Press shimmer on with a fingertip for a gentle finish, or use a flat brush for more control.

    Use Eyeliner With a Light Hand

    Instead of a sharp black wing, try brown, plum, charcoal, or deep bronze liner close to the upper lashes. Smudge the line with a small brush before it sets to create soft definition. You can also use dark eyeshadow with an angled brush for an even more diffused effect.

    Finish with one or two coats of mascara. Focus on separating the lashes rather than building extreme volume. For a special occasion, individual lash clusters or a natural-looking half lash can add lift while keeping the look wearable.

    Bring Warmth Back With Blush and Bronzer

    Blush gives soft romantic makeup its healthy, alive quality. Cream and liquid formulas are especially helpful when you want skin to look naturally luminous, although powder blush can work well over a set base. Apply blush to the apples of the cheeks and blend upward toward the temples for a lifted effect.

    Rosy pink, peach, apricot, and soft berry shades are all lovely options. Choose a color that resembles the natural flush your skin gets after a walk or a warm conversation. Start with a small amount, then build slowly. It is much easier to add blush than to remove it.

    If you use bronzer, choose a shade that adds gentle warmth rather than a strong contour. Sweep it lightly around the outer edges of the face, along the temples, and beneath the cheekbones. A subtle cream bronzer can look especially seamless when blended before powder products.

    Add a Delicate Highlight

    Highlight should support the glow of the skin, not create a stripe of sparkle. Choose a finely milled powder, liquid, or cream formula with a soft sheen. Apply a small amount to the high points of the cheeks, the bridge of the nose if you enjoy that effect, and the cupid’s bow.

    For a more understated finish, use a radiant blush instead of a separate highlighter. This can give the cheeks a gentle glow while keeping the overall look simple and cohesive.

    Lipstick and lip pencil with a flower on a soft pink background

    Choose a Lip Color You Can Reapply Easily

    A comfortable lip color makes the entire look more practical for dinner, conversation, and photos. Rosy nude lipstick, sheer berry balm, peach gloss, or a softly blurred pink stain can all work well. If you are unsure which direction to choose, look at the tone of your blush and select a lip color that belongs to the same color family.

    For more definition, lightly trace the lips with a liner close to your natural lip tone, then soften the edges with a fingertip or lip brush. Apply lipstick or gloss in the center first and press the lips together. This creates a diffused effect that feels less formal than a sharply outlined lip.

    Bring your lip product with you for easy touch-ups. A makeup look feels more relaxed when you are not worried about keeping every detail perfect.

    Set the Makeup Without Losing the Glow

    Setting products can help makeup last through an evening, but using too much powder can take away the soft finish you worked to create. Apply translucent powder only where you tend to get shiny, such as the sides of the nose, chin, or center of the forehead. Leave the high points of the cheeks more radiant.

    A setting spray can help powders and creams blend together and make the final makeup look less layered. Hold it at a comfortable distance and mist lightly. Let it dry naturally before getting dressed or touching your face.

    Common Mistakes to Avoid

    Soft romantic makeup is forgiving, but a few habits can make it look heavier than intended. The first is applying too many full-coverage products at once. Use a lighter hand with foundation, concealer, contour, powder, and highlighter so the skin still has dimension.

    Another common mistake is choosing a very bold feature without balancing the rest of the face. A deep lip or dramatic lash can still be beautiful, but keep eyes, cheeks, or both more understated. Finally, do not skip blending. Take a moment to soften the edges of eyeshadow, blush, bronzer, and lip liner before you leave.

    Final Thoughts

    Soft romantic makeup is about looking polished while still feeling comfortable and recognizable. A fresh base, blended eyes, warm blush, and a wearable lip color can create a look that suits date nights and special plans without requiring complicated techniques. Choose shades that make you feel at ease, and let the finish be softly luminous rather than overly perfect.

    FAQs

    What colors are best for soft romantic makeup?

    Rose, peach, mauve, soft berry, champagne, taupe, and warm brown are versatile choices. Pick shades that suit your skin tone and repeat a similar undertone across the eyes, cheeks, and lips.

    Can I create this look with minimal makeup?

    Yes. A skin tint, cream blush, mascara, soft brow product, and tinted lip balm are enough to create a simple romantic version of the look.

    Should soft romantic makeup use matte or glowy products?

    A mix usually looks most balanced. Use a natural or satin base, softly luminous cheeks, and a little powder only where you need it for comfort.

    How can I make the makeup last through dinner?

    Apply thin layers, set only areas that become shiny, use a light mist of setting spray, and bring your lip product for touch-ups.

    Can I wear a red lip with soft romantic makeup?

    Yes. Choose a softer red, rose-red, or blurred stain, then keep the eyes and cheeks more understated so the overall look remains balanced.

  • The Secret to Flawless Makeup: 5 Products Every Woman Needs

    The Secret to Flawless Makeup: 5 Products Every Woman Needs

    Introduction: The Art and Science of Makeup
    Makeup may look simple on the surface, but it’s actually a combination of art and science. You might spend ten minutes on your daily routine, yet the “flawless” result depends not only on skill but also on the products you choose. Why do two people following the same steps get completely different results? Often, it’s all in the products. Choosing wisely can give every woman a perfect finish.

    1. Effective Base Makeup: The Foundation of Perfect Skin

    Choosing the Right Foundation or Cushion


    Your base makeup is the soul of your look. A foundation or cushion that suits your skin type can make it appear naturally flawless. Dry skin benefits from moisturizing foundations, while oily skin requires oil-control formulas.

    Concealing Pores and Imperfections
    Concealer is not just for pimples—it hides pores and uneven skin tone. Lightly tapping the product rather than rubbing ensures a natural finish.

    How to Choose Products Based on Skin Type
    Different skin types have different needs. Dry skin focuses on hydration, oily skin on oil control and staying power.

    Balancing Coverage and Lightweight Finish
    High-coverage foundations can feel heavy. The key is using concealer only where needed while keeping other areas light for a natural effect.

    2. Setting Products: Keeping Your Makeup Flawless All Day

    Differences Between Loose Powder, Pressed Powder, and Setting Spray
    Loose powder controls oil, pressed powder enhances smoothness, and setting spray locks makeup while adding radiance.

    Adjusting Your Routine for Different Seasons
    Summer requires oil-controlling powders, while winter benefits from hydrating sprays.

    Combining Oil Control and Hydration
    For combination skin, apply powder only in oily areas, then lightly mist the whole face with a hydrating spray for lasting comfort.

    3. Highlight & Contour: The Secret to Sculpted Features

    Using Light and Shadow to Shape Your Face
    Highlighter and contour instantly create dimension. Highlight cheekbones, nose bridges, and forehead to define facial structure.

    Powder, Liquid, and Cream Options
    Powder highlighters suit oily skin, liquid formulas hydrate dry skin, and cream products create a luminous effect.

    Avoiding Over-Contouring for Beginners
    New users often overdo contouring. Start light, then gradually build depth to avoid a heavy appearance.

    4. Eye Makeup Essentials: Make Your Eyes Stand Out

    Choosing and Combining Eyeshadows
    Neutral tones are ideal for daily wear, smoky shades for evening events. Using 3–4 colors creates natural depth.

    Eyeliner and Mascara Techniques
    Eyeliner defines the shape, while mascara adds length and volume. Small details dramatically change your eye expression.

    Tips to Add Depth and Dimension
    Brighten inner corners or lightly smudge the lower lash line to create a more open, alert look.

    5. Lip Products: The Key to a Polished Look

    Choosing Lipstick, Lip Gloss, and Lip Liners
    Lip liner defines shape; lipstick or gloss adds color and polish. Choose shades that complement your overall makeup and skin tone.

    Matching Lip Colors with Different Makeup Styles
    Daily looks favor nude or soft pink shades, evening looks work well with deep reds or berries for a bolder effect.

    Tips for Long-Lasting Lip Color
    Apply a lip balm first, blot lightly with tissue, then layer lipstick to increase staying power.

    Pro Tips: Maximizing the Effect of These 5 Products

    Tools: Brushes, Sponges, and Fingers
    Different products require different tools. Use a beauty sponge for foundation, blush brushes for color, and fingertips for highlighter for a natural finish.

    The Importance of Application Order
    Follow this order: base → setting → contour → eyes → lips. It saves time and ensures makeup lasts longer.

    Adjusting for Daily vs. Evening Makeup
    Daytime makeup should be light and natural; evening makeup can use stronger eye shadow and highlighter for more depth and glow.

    Conclusion: Flawless Makeup Is Science, Not Magic
    Flawless makeup isn’t a secret—it’s about understanding and strategy. Master these 5 essential products, adjust for skin type, occasion, and season, and every woman can achieve perfect results. Investing in high-quality basics is the smartest beauty investment you can make.

    FAQs

    1. Are these products suitable for all skin types?
      Each product suits certain skin types; always consider your skin before purchasing.
    2. How can beginners avoid makeup mistakes?
      Start with basic product usage, apply gradually, and avoid using too many products at once.
    3. Does price affect product effectiveness?
      Price doesn’t always equal effectiveness, but high-quality, reliable formulas often produce better results.
    4. How should products be adjusted for different seasons?
      Summer: focus on oil control; Winter: focus on hydration. Adjust products and amounts accordingly.
    5. What’s the difference between daily and professional makeup?
      Daily makeup emphasizes natural, lightweight finishes; professional makeup prioritizes staying power and polish.
    6. Which of the five products is most important?
      Base makeup is foundational—without it, other products’ effects diminish.
  • Beginner’s Guide to Flawless Contouring – Learn in 5 Minutes

    Beginner’s Guide to Flawless Contouring – Learn in 5 Minutes

    Want to make your face look more sculpted and your features pop in photos? Contouring is the secret weapon of makeup—it’s the step that can transform a flat face into a dimensional masterpiece. Don’t worry; it’s not as intimidating as it seems. With just 5 minutes, you can master simple and practical techniques that bring your makeup to life.


    1. Why Contouring is the Soul of Makeup

    Core Purpose: Sculpting Defined Features

    Contouring is essentially the art of light and shadow. By strategically placing darker and lighter shades, you can visually reshape your face—making the nose appear straighter, the jaw sharper, and the cheekbones higher. Think of it as sculpting with makeup!

    Why Beginners Find Contouring Challenging

    Most tutorials seem overly complex: precise lines, multiple layers, and face shape-specific rules. The secret? It’s all about placement and intensity, not product quantity. Follow these steps, and it’s surprisingly easy.


    2. Preparing for Contouring

    Understand Your Face Shape

    Contouring is not one-size-fits-all. Round, square, long, and oval faces all require different approaches. Look in the mirror, identify your face shape, and apply the appropriate technique.

    Essential Tools Checklist

    Contour Stick vs Contour Powder

    Cream sticks are beginner-friendly and easy to control. Powders are better for oily skin or long-lasting makeup.

    Makeup Sponge vs Brush

    Brushes allow precise contour lines, while a damp beauty sponge softens edges for a natural finish. Combining both gives the best result.


    3. 5-Minute Basic Contouring Technique

    Step 1: Create Shadows for Definition

    Apply contour to the hollows of your cheeks, jawline, and sides of your nose to slim and sculpt the face.

    Step 2: Highlight Key Areas for Dimension

    Apply highlighter to the forehead center, nose bridge, chin, and under-eye triangles to mimic natural light reflection.

    Step 3: Blend for a Natural Look

    Use a damp sponge to gently press and blend, erasing harsh lines and creating a seamless finish.

    Step 4: Set Your Contour for Longevity

    Sweep translucent powder over your face to control shine and lock in layers.


    4. Contouring Tips for Different Face Shapes

    Round Face: Lengthen Proportions

    Focus on the cheeks and jawline with vertical shadows to slim and elongate.

    Square Face: Soften Angular Lines

    Contour the jaw corners and highlight the center to create softer angles.

    Long Face: Shorten Vertical Depth

    Minimize nose bridge highlight, add shadow to forehead and chin to compress vertical length visually.

    Oval Face: Balance Light and Shadow

    With naturally proportional features, light highlighting is enough to enhance dimensions.


    5. Common Contouring Mistakes & How to Fix Them

    Overly Harsh Lines

    Apply little by little, blending as you go to avoid “muddy” results.

    Wrong Placement of Light & Shadow

    Shadow belongs under cheekbones, highlighter on natural high points.

    Choosing the Wrong Product Texture

    Dry skin? Cream contour. Oily skin? Powder. Mix textures if needed.


    6. 5 Pro Contouring Tips from Makeup Artists

    1. Use Natural Light – Reflects real skin tones and shadow placement.
    2. Build Gradually – Multiple thin layers are more natural than one thick application.
    3. C-Shaped Highlight – Sweep from brow bone to cheekbone for healthy glow.
    4. Mix Cream & Powder – Adds depth and dimension.
    5. Connect Blush with Contour – Creates seamless transitions.

    7. Recommended Contour Products for Beginners

    Drugstore Options

    • Maybelline Master Contour Stick – Easy, versatile, and beginner-friendly.
    • NYX Wonder Stick – Affordable, natural shades.
    • e.l.f. Contour Palette – Fine powder, easy to blend.

    High-End Options

    • NARS Laguna Bronzer – Contour classic.
    • Fenty Beauty Match Stix – Excellent shade matching.
    • Charlotte Tilbury Contour Wand – Creamy, natural glow finish.

    8. Advanced Tips: Contouring for Photography

    Use Camera Lighting to Enhance Contours

    In photos, slightly stronger contour helps features stand out on camera.

    Adjust Intensity for Different Occasions

    Daily makeup? Light contour. Night or event? Slightly stronger to define features.


    9. Trending Styles: From Heavy to “Barely There” Contouring

    The Rise of Korean Natural Contouring

    Soft shadows and subtle highlights emphasize natural skin texture and glow.

    Western Contouring’s Bold Precision

    Still favors strong shadows for defined, sculpted features.


    10. Post-Contour Skincare & Removal Tips

    Deep Cleansing to Avoid Clogged Pores

    Most contour products are high in pigment or oils. Double cleansing prevents breakouts.

    Choose Skincare-Infused Foundations

    Products with hyaluronic acid or vitamin C help maintain skin health under makeup.


    11. Quick Recap: 5-Minute Contour Formula

    Shadow → Highlight → Blend → Set
    Follow these four steps, and you’ll have a naturally sculpted face in minutes.


    12. Conclusion: Turn Contouring into Your “Face Magic”

    Contouring isn’t about changing your face—it’s about enhancing your best features. With 5 minutes of practice, you’ll see a natural transformation, boosting confidence in every light and every photo.


    FAQs

    1. What’s the difference between contour and highlight?
    Contour creates shadows to slim or sculpt; highlight brightens raised areas for dimension.

    2. Can I contour without professional tools?
    Yes! Your fingers or a beauty sponge can work. Blending is key.

    3. Should beginners use cream or powder contour?
    Cream is easier to control; powder suits oily skin or experienced users.

    4. How do I pick the right contour shade?
    1–2 shades darker than your skin tone is natural. Too dark looks muddy; too light has no effect.

    5. Do I need contouring for everyday work makeup?
    Light contouring enhances your features subtly, making you appear fresh and polished.

  • How to Find Your Perfect Shade of Red Lipstick – Expert Tips Inside

    How to Find Your Perfect Shade of Red Lipstick – Expert Tips Inside

    Finding the perfect red lipstick isn’t as simple as picking the first tube you see on the shelf. Red lipstick is a timeless classic, but with so many shades, textures, and formulations, how do you know which one works best for you? Whether you’re looking to make a bold statement or add a pop of color to your everyday makeup routine, the right red lipstick can elevate your look. Let’s dive into expert tips to help you discover your perfect red.

    Understanding Different Types of Red Lipstick

    Red lipstick comes in various shades, from classic reds to deeper, warmer tones. Here’s an overview of the different types of red lipsticks available:

    Classic True Red

    A true red is a universally flattering color, often described as a bold, neutral red. It’s perfect for those who want a timeless, vibrant shade that works for almost every occasion.

    Warm-Toned Reds

    Warm reds have underlying orange, brick, or brown hues. These shades give off a cozy, inviting vibe and are especially flattering on people with warm undertones in their skin.

    Cool-Toned Reds

    Cool-toned reds have a bluish or purplish base. They tend to look more striking and dramatic, especially on those with cool undertones. These shades also have a more modern, chic vibe.

    Light and Dark Reds

    Light red lipsticks are perfect for casual looks, giving off a soft and fresh appearance. On the other hand, deep red lipsticks are bold and sophisticated, ideal for formal events or evening outings.

    Choosing the Right Red Lipstick for Your Skin Tone

    Choosing a red lipstick that complements your skin tone is key to getting the best result. Here’s how to match the right red with your undertones:

    Red Lipsticks for Cool Undertones

    If you have cool undertones (think pink, red, or blue hues), choose reds that have a blue or purple base. These shades will help enhance your natural complexion and create a striking contrast against your skin.

    Red Lipsticks for Warm Undertones

    For those with warm undertones (yellow, golden, or peachy hues), opt for red shades that lean toward orange or brown. These tones will harmonize with your complexion, creating a balanced and warm look.

    Red Lipsticks for Neutral Undertones

    Lucky for those with neutral undertones (neither too warm nor too cool), you can wear almost any red. From the traditional bright red to deeper, berry tones, the choice is yours!

    How Lipstick Texture Affects Color Payoff

    The texture of a lipstick greatly impacts its finish, longevity, and how vibrant the color appears. Let’s break down the key types of lipstick textures:

    Matte vs. Glossy Lipsticks

    Matte lipsticks are bold and long-lasting but can sometimes feel dry. They are perfect for achieving a powerful, statement-making look. Glossy lipsticks, on the other hand, add shine and moisture, which makes them perfect for a fresh, youthful look, but they may not last as long.

    The Velvet Lipstick Appeal

    Velvet lipsticks offer the best of both worlds. They provide a soft, matte finish while still feeling comfortable and creamy. This texture is perfect for those who want a sophisticated yet comfortable option.

    Picking the Right Red Lipstick for Different Occasions

    Red lipstick isn’t just for evenings out—there’s a perfect red for every occasion. Here’s how to choose:

    Red Lipsticks for Everyday Looks

    For a more natural, day-to-day look, opt for a red that isn’t too bold or deep. Light reds or warm reds with a creamy or glossy texture are great choices for everyday wear.

    Red Lipsticks for Formal and Evening Events

    Deep red or classic red lipsticks are perfect for special occasions or evening events. These shades are rich and sophisticated, making them ideal for adding elegance and drama to your look.

    Expert Tips for Choosing the Perfect Red Lipstick

    Choosing the right red lipstick can be overwhelming, but with these expert tips, you’ll be able to find your perfect match.

    The Importance of Swatching

    Swatching is one of the most crucial steps when choosing a lipstick. Always try before you buy. Test the lipstick on your lips (not just your wrist) and in different lighting to ensure it’s the right shade for you.

    Lipstick Application Tips

    To make your red lipstick last longer, outline your lips with a lip liner before filling them in with lipstick. This will prevent bleeding and create a sharper, more defined lip look.

    Top Red Lipstick Brands to Try

    Here are some of the best red lipsticks across various price ranges:

    High-End Brands

    • Dior: Known for its luxurious feel and bold shades, Dior’s red lipsticks are iconic and a favorite among makeup enthusiasts.
    • Chanel: Chanel red lipsticks are elegant and refined, offering a beautiful finish that works for all skin tones.

    Drugstore Brands

    • Maybelline: A great choice for those looking for affordable yet high-quality reds. Maybelline’s formula offers a wide range of red hues suitable for every skin tone.
    • L’Oréal: L’Oréal’s red lipsticks offer rich, lasting color at a more accessible price point.

    Conclusion

    Finding the perfect red lipstick is about more than just picking a color off the shelf. It’s about understanding your skin tone, experimenting with different textures, and selecting the right shade for each occasion. By following the tips above, you’ll be able to confidently choose a red lipstick that flatters your complexion and fits your personal style.

    Frequently Asked Questions (FAQs)

    1. How do I know which red lipstick is right for me?
      • The best way to find your perfect shade is to swatch several shades in natural lighting. Pay attention to how the color complements your skin tone.
    2. Can red lipstick look too harsh?
      • Red lipstick can look bold, but with the right shade and texture, it can complement any look, whether you’re aiming for a soft everyday look or a bold evening statement.
    3. How can I make red lipstick last longer?
      • Use a lip liner to define your lips before applying lipstick. This helps prevent feathering and increases the longevity of your lipstick.
    4. What is the best red lipstick for a formal event?
      • Deep red or classic red shades work best for formal events, giving off an elegant and sophisticated vibe.
    5. Can I wear red lipstick during the day?
      • Yes! Just choose a softer red or a warm-toned red and pair it with a natural makeup look for daytime wear.
  • How to Make Your Skin Glow Naturally – 10 Proven Methods

    How to Make Your Skin Glow Naturally – 10 Proven Methods


    Why Is Glowing Skin So Important for Overall Health?

    The Scientific Definition of Glowing Skin

    Have you ever wondered why some people’s skin shines naturally, even without makeup? Glowing skin is more than just a “good complexion.” Scientifically, it refers to the skin’s ability to reflect light evenly and its overall brightness, which signals healthy skin cells and optimal hydration.

    Glowing Skin Reflects Internal and External Health

    Your skin, the body’s largest organ, mirrors both your internal health and external environment. Poor diet, lack of sleep, and stress all dull your skin’s natural radiance. Conversely, healthy habits and scientific skincare can restore that youthful glow from within.


    Key Factors That Affect Your Skin’s Glow

    The Role of Genetics

    Your genes influence your skin’s baseline characteristics, such as oil production and pigmentation. While you can’t change genetics, lifestyle and skincare can significantly improve your skin’s appearance.

    Environmental Pollution and UV Damage

    Pollutants and ultraviolet rays accelerate oxidative stress and collagen breakdown, leading to dullness and premature aging.

    Lifestyle and Dietary Habits

    Poor habits like late nights, smoking, excessive drinking, and inactivity disrupt your skin’s balance and cell renewal, reducing its natural glow.


    10 Proven Natural Methods to Achieve Glowing Skin

    1. Prioritize Quality Sleep

    How Sleep Repairs Your Skin

    During deep sleep, the body releases growth hormones that regenerate skin cells and repair daytime damage, strengthening the skin barrier.

    Tips to Improve Sleep Quality

    Limit screen time before bed, create a dark and quiet environment, and maintain a consistent sleep schedule for maximum skin restoration.

    2. Eat a Balanced Diet Rich in Antioxidants

    The Benefits of Vitamins C and E

    Vitamin C boosts collagen production and brightens skin, while Vitamin E protects against free radical damage.

    Foods High in Antioxidants to Include

    Berries, nuts, leafy greens, citrus fruits, avocado, and olive oil help nourish your skin from the inside out.

    3. Stay Hydrated for Moisturized Skin

    The Relationship Between Water Intake and Skin Metabolism

    Water fuels cellular metabolism and toxin elimination, keeping skin plump, smooth, and glowing.

    4. Exercise Regularly to Boost Circulation

    How Exercise Enhances Skin Radiance

    Increased blood flow delivers oxygen and nutrients to skin cells, giving your face a natural, healthy flush.

    5. Follow Proper Skincare Steps: Cleansing and Moisturizing

    Choose Cleanser Suited to Your Skin Type

    Use gentle cleansers to maintain the skin’s protective oils without stripping moisture.

    The Science Behind Moisturizing

    Moisturizers lock in hydration and reinforce the skin barrier with ingredients like hyaluronic acid and glycerin.

    6. Use Natural Skincare Ingredients

    Benefits of Green Tea, Aloe Vera, and More

    Green tea is rich in antioxidants and anti-inflammatory compounds, while aloe soothes and heals damaged skin, ideal for sensitive types.

    7. Exfoliate Regularly to Promote Cell Renewal

    Differences Between Physical and Chemical Exfoliation

    Physical scrubs manually remove dead skin, while chemical exfoliants (like AHAs and BHAs) dissolve buildup gently. Select the best method for your skin to avoid irritation.

    8. Don’t Skip Sunscreen: Prevent UV Damage

    Choosing and Using Sunscreen Correctly

    Apply a broad-spectrum sunscreen with SPF 30 or higher daily, rain or shine, to protect collagen and prevent pigmentation.

    9. Manage Stress for Healthy Skin

    The Link Between Stress and Skin Inflammation

    Stress hormones trigger inflammation and breakouts. Techniques like meditation and yoga help calm your mind and skin.

    10. Avoid Smoking and Excessive Alcohol

    How Smoking and Drinking Accelerate Skin Aging

    Toxins from smoke and alcohol impair collagen and elastin, leading to dull, aged skin.


    Integrating These Methods for Lasting Radiance

    How to Incorporate These Habits into Daily Life

    You don’t need to overhaul your routine overnight. Start with sleep and hydration, then gradually include balanced nutrition, proper skincare, and sun protection.

    The Importance of Consistency

    Long-lasting glow comes from daily care and healthy habits. Skipping steps weakens your results—consistency is key.


    Conclusion

    Natural glowing skin isn’t a miracle but a reward of science-backed lifestyle choices and skincare. From prioritizing restful sleep to eating antioxidant-rich foods and daily sun protection, each step matters. Adopt these 10 proven methods and watch your skin transform, radiating health and confidence from within.


    FAQs

    Q1: I have oily skin. How can I achieve a natural glow?
    Choose lightweight, non-comedogenic products that balance oil without clogging pores. Maintain a gentle cleansing and moisturizing routine.

    Q2: Can sensitive skin use natural skincare ingredients safely?
    Many natural ingredients are gentle, but always patch-test first to avoid reactions. Opt for fragrance-free, hypoallergenic options.

    Q3: How do I know if my skin is dehydrated?
    Signs include tightness, fine lines, and flaky patches. Increase hydration through moisturizers and drinking water.

    Q4: What’s the difference between glowing skin and whitening?
    Glowing skin refers to overall brightness and radiance, while whitening targets pigmentation and uneven skin tone.

    Q5: How do nighttime and daytime skincare differ?
    Nighttime focuses on repair and nourishment with richer formulas; daytime emphasizes protection, mainly from UV rays.